NodeJs Salesforce Integration using JSforce: A Quick Guide
Last Updated on July 24, 2024
Quick Summary:
In this blog post, we will delve into exploring the best practices for Nodejs Salesforce integration using JSforce. Learn how you can use the powerful JSforce library, previously known as Node Salesforce, to integrate Salesforce with Node.js through a step-by-step tutorial. The blog post also covers the importance of Nodejs Salesforce integration, discusses Salesforce JSforce and its popularity, and highlights the prerequisites you need to get started for using JSforce to integrate Salesforce with Nodejs.
Nodejs salesforce integration has been one of the leanest methods for business processes to reduce the time and effort during app development.Node.js is suitable for salesforce integration because of its largest package repository called npm. At present, npm incorporates more than 1.4M packages and libraries that can be employed for any Node.js project.
Primarily, salesforce developers use JS to build applications; Javascript powers the components like Lightning web and AURA. Server-side applications like Salesforce CLI are also created using JavaScript.On the other hand, when it comes to Node.js, it is an open-source JS runtime powered by V8.
Node.js is one of the most sound runtime environments for scripting applications that multiple users access simultaneously; these include web applications and APIs.
NASA, PayPal, Walmart, LinkedIn, Netflix, and of course, Salesforce use this open-source Javascript framework.

Through Node Js Salesforce integration, you can
I hope these reasons are enough to emphasize how beneficial the salesforce nodejs integration is for your business.
Salesforce Nodejs integration is possible mainly with two mediums:-
1. JSForce
2. Endpoint
Here we will discuss the concept of JSforce.
JSforce, formerly known as Node Salesforce, is an isomorphic JavaScript Library using Salesforce’s API. It runs both in the program and with Node.js. Also, it encapsulates the admittance to different APIs given by Salesforce in offbeat JavaScript work calls.
Dissimilar to other Salesforce API libraries, it is planned to provide a coordinated interface for both server-side and customer-side applications, so you don’t need to rework comparative rationales with various libraries just for running in multiple climates.
JSforce has a helpful Control Line Interface (CLI), which gives an intelligent control center (REPL) to gain command with a hassle-free utilization.
In short, with the assistance of JSforce, you can get admittance to different APIs given by Salesforce in nonconcurrent JavaScript work calls.
Integrate your apps with salesforce for a more secured, smoother, and reliable performance experience.
Hire Salesforce Developer to accelerate your business processes today!
When talking about adopting the new technology, there are a few prerequisites that one needs to take care of. Working on anything new becomes quite exciting and engaging with some basic information, given below.
Before working with JSforce, you should
You should ensure all the above essential requisites before moving forward with nodejs salesforce integration.
Firstly, a Node Js or JS file is created. Next, we need to include the Express framework in JS to reflect the information on the browser.
We’ll remember JSforce for the JS record to associate with Salesforce. Then we’ll support returned Data from Salesforce after running this js record.
Here are the steps you should follow:
1. First, Download Node Js and NPM on your PC.
2. After effectively installing Nodejs, now we need to introduce JSforce.
3. Now, install the Express framework
4. Now, we need to create a JS file in order to connect with Salesforce

var express = require( 'express' ); //Adding Express
var http = require( 'http' ); //Adding http
var jsforce = require('jsforce'); //Adding JsForce
var app = express();
app.set( 'port', process.env.PORT || 3001 );
app.get('/', function (req, res) {
var conn = new jsforce.Connection({
// you can change loginUrl to connect to sandbox or prerelease env.
// loginUrl : 'https://test.salesforce.com'
});
var username = 'xyz@salesforce.com';
var password = 'PassWord+SecurityToken';
conn.login(username, password, function(err, userInfo) {
if (err) { return console.error(err); }
// Now you can get the access token and instance URL information.
// Save them to establish a connection next time.
console.log(conn.accessToken);
console.log(conn.instanceUrl);
// logged in user property
console.log("User ID: " + userInfo.id);
console.log("Org ID: " + userInfo.organizationId);
res.send('heySalesforce : JSForce Connect Successed!');
});
});
http.createServer( app ).listen( app.get( 'port' ), function (){
console.log( 'Express server listening on port ' + app.get( 'port' ));
});
Now it’s time for DML (Data Manipulation Language) operations
5. Now retrieve a few accounts and show them in the terminal with the help of the following code

var records = [];

conn.query("SELECT Id, Name FROM Account", function(err, result) {

in the event that (blunder) { return console.error(err); }

console.log("total : " + result.totalSize);

console.log("fetched : " + result.records.length);

});
This is quite simple! We will utilize SOQL inquiry and show our organization’s all outnumbered Accounts.
For that, we need to place the above code after effective authorization and get access code as past code.
Unveil the full potential of your existing salesforce CRM platform
Get in touch with the top Salesforce integration Company to experience faster development opportunities today.

var express = require( 'express' );//Adding Express

var http = require( 'http' );//Adding http

var jsforce = require('jsforce');//Adding JSforce

var application = express();

app.set( 'port', process.env.PORT || 3001 );

app.get('/', work (req, res) {

var conn = new jsforce.Connection({

/you can change the login URL to interface with the sandbox or prerelease env.

/loginUrl : 'https://test.salesforce.com'

});

var username = 'asifjee@salesforce.com';

var secret phrase = 'PassWord+SecurityToken';

conn.login(username, secret phrase, function(err, userInfo) {

in the event that (blunder) { return console.error(err); }

/Now, you can get the entrance token and example URL data.

/Save them to set up association sometime later.

console.log(conn.accessToken);

console.log(conn.instanceUrl);

/signed in client property

console.log("User ID: " + userInfo.id);

console.log("Org ID: " + userInfo.organizationId);

/Perform SOQL Here

var records = [];

conn.query("SELECT Id, Name FROM Account", function(err, result) {

on the off chance that (blunder) { return console.error(err); }

console.log("total : " + result.totalSize);

console.log("fetched : " + result.records.length);

});

res.send('heySalesforce : JSForce Connect Successed!');

});

});

http.createServer( application ).tune in( app.get( 'port' ), work (){

console.log( 'Express server tuning in on port ' + app.get( 'port' ));

});
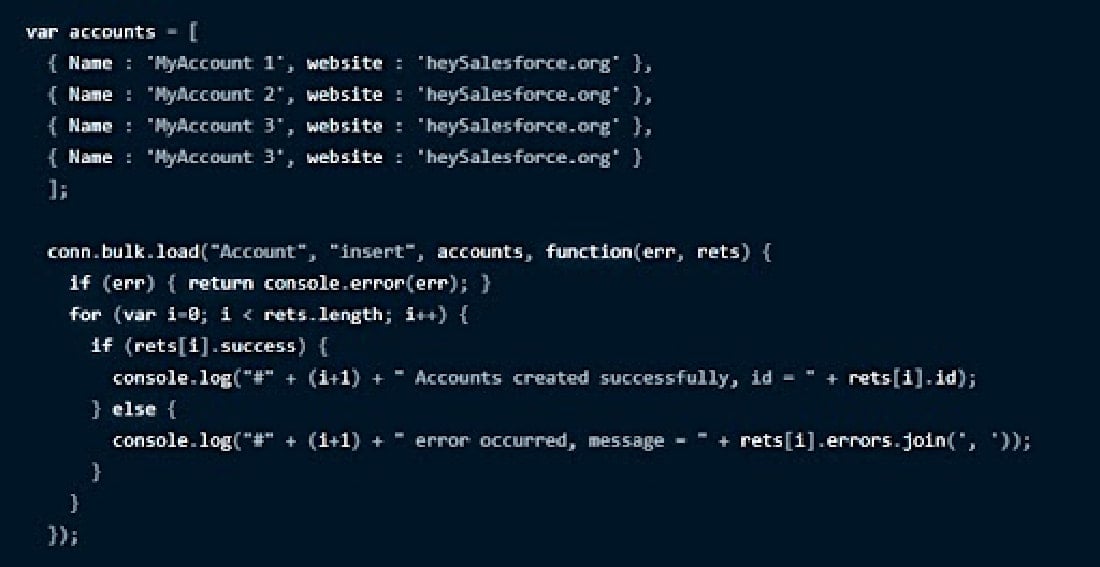
6. Now we create some other accounts using the BULK API.

var accounts = [

{ Name : 'MyAccount 1', site : 'heySalesforce.org' },

{ Name : 'MyAccount 2', site : 'heySalesforce.org' },

{ Name : 'MyAccount 3', site : 'heySalesforce.org' },

{ Name : 'MyAccount 3', site : 'heySalesforce.org' }

];

conn.bulk.load("Account", "embed", accounts, function(err, rets) {

on the off chance that (fail) { return console.error(err); }

for (var i=0; I < rets.length; i++) {

on the off chance that (rets[i].success) {

console.log("#" + (i+1) + " Accounts made effectively, id = " + rets[i].id);

} else {

console.log("#" + (i+1) + " mistake happened, message = " + rets[i].errors.join(', '));

}

}

});

View the below code-

var express = require( 'express' );/Adding Express

var http = require( 'http' );/Adding http

var jsforce = require('jsforce');/Adding JSforce

var application = express();

app.set( 'port', process.env.PORT || 3001 );

app.get('/', work (req, res) {

var conn = new jsforce.Connection({

/you can change the login URL to interface with the sandbox or prerelease env.

/loginUrl : 'https://test.salesforce.com'

});

var username = 'asifjee@salesforce.com';

var secret key = 'PassWord+SecurityToken';

conn.login(username, secret key, function(err, userInfo) {

on the off chance that (blunder) { return console.error(err); }

/Now, you can get the entrance token and occurrence URL data.

/Save them to set up association sometime later.

console.log(conn.accessToken);

console.log(conn.instanceUrl);

/signed in client property

console.log("User ID: " + userInfo.id);

console.log("Org ID: " + userInfo.organizationId);

/Perform SOQL Here

var records = [];

conn.query("SELECT Id, Name FROM Account", function(err, result) {

in the event that (fail) { return console.error(err); }

console.log("total : " + result.totalSize);

console.log("fetched : " + result.records.length);

});

/Perform account inclusion

var accounts = [

{ Name : 'MyAccount 1', site : 'heySalesforce.org' },

{ Name : 'MyAccount 2', site : 'heySalesforce.org' },

{ Name : 'MyAccount 3', site : 'heySalesforce.org' },

{ Name : 'MyAccount 3', site : 'heySalesforce.org' }

];

conn.bulk.load("Account", "embed", accounts, function(err, rets) {

on the off chance that (blunder) { return console.error(err); }

for (var i=0; I < rets.length; i++) {

on the off chance that (rets[i].success) {

console.log("#" + (i+1) + " Accounts made effectively, id = " + rets[i].id);

} else {

console.log("#" + (i+1) + " mistake happened, message = " + rets[i].errors.join(', '));

}

}

});

res.send('heySalesforce : JSForce Connect Successed!');

});

});

http.createServer( application ).tune in( app.get( 'port' ), work (){

console.log( 'Express server tuning in on port ' + app.get( 'port' ));

});
Now, try it yourself.
So, we have almost covered the main idea and discussed the nodejs salesforce integration workflow. Let us quickly go through the advantages of Salesforce Node.js integration.
Going through this comprehensive guide showcases how you can effortlessly integrate Salesforce with Nodejs using JSforce (Node Salesforce). It is certain that the Nodejs Salesforce integration undoubtedly opens up a range of benefits, such as developing apps faster, using modern technologies to build scalable, future-proof web applications, and building pro-code apps on the Salesforce platform.
Follow the easy and simple steps mentioned above to smoothly connect your Node.js apps with Salesforce using the JSforce library. The Salesforce Nodejs integration not only streamlines your workflows but also enables your application to handle complex tasks swiftly. Take your app development speed and performance to the next level by embracing the power of Salesforce JSforce to integrate Salesforce with Node.js.
Interested in specific Salesforce integrations?
Check Out Other Salesforce Integration Guides:
1. LinkedIn Salesforce Integration
2. Salesforce CI/CD Integration
3. Salesforce Integration with third-party apps
The cost of Salesforce node js integration using JSForce relies on several technical factors. It would be best if you would connect with our salesforce experts. We assure you offer the best-in-class services at highly affordable prices. Start your 15-day risk-free trial with the most renowned Salesforce Consulting company today.
Picking between endpoint and JSForce to integrate nodejs with Salesforce completely depends upon your requirements. To know more about it, feel free to get in touch with our salesforce experts. Book your free consultation today.
Yes, Nodejs can be used to build the Salesforce CLI plugin. To build the plugin, all you need is the latest long-term support (LTS) version of Node.js.
You can configure your data synchronization with the provision of Heroku Connect. The Salesforce and Heroku Postgres database is synchronized using this (Heroku Connect) API reference.
Your Success Is Guaranteed !
We accelerate the release of digital product and guaranteed their success
We Use Slack, Jira & GitHub for Accurate Deployment and Effective Communication.