A Detailed Tutorial On How To Use MotionLayout In Android
Last Updated on December 27, 2024
Quick Summary
In the world of Android development, a vast array of widgets and libraries are available that you can use to create breathtaking animations for your Android apps. One such tool is MotionLayout. It is a fully declarative tool that allows describing complex transitions in XML. Also, the Android Studio provides graphical tooling, and the MotionLayout In Android is backward compatible with API level 14. In this blog post, we have covered all the aspects of MotionLayout in android, along with a step-by-step guide on adding animations to your Android application, enabling you to create stunning, interactive experiences for your users as per your requirements.
MotionLayout is an Android layout option that helps developers manage motion and widget animation in their applications. As a subclass of ConstraintLayout, it offers various features that build upon its rich layout capabilities. This layout type empowers every android developer to create interactive animations and transitions between different UI elements using keyframes and constraints.
The Android MotionLayout makes it easier to define animations using start and end states to automatically generate the intermediate frames needed to transition between them smoothly. The animations can include movements, rotations, scaling, alpha fading, and more.
By bridging the gap between layout transitions and complex motion handling, MotionLayout in Android offers a mix of features between the property animation framework, TransitionManager, and Coordinator Layout. It also supports seekable transitions, allowing developers to show any point within the change based on a particular condition, such as touch input. In addition, MotionLayout supports keyframes, enabling fully customized transitions to suit your needs.
One of the most significant advantages of MotionLayout is that it is fully declarative, meaning that you can describe any transition in XML, no matter how complex. Therefore, creating and managing animations without writing much code becomes more effortless. MotionLayout Android is a support library and is backward-compatible with API level 14.
The Android framework offers several ways, such as Animated Vector Drawable, Property Animation Framework, Layout Transition Animations, Layout Transitions with TransitionManager, CoordinatorLayout, and more, by which we can add animation to our application. But, it is crucial to know the need for MotionLayout and how it differs from the existing ones.
Some animation styles that Motion Layout in Android can implement are keyframes and seekable transitions. Keyframes enable you to customize transitions to fit your needs. On the other hand, seekable transitions allow you to jump at a particular point in the animation. One huge advantage of MotionLayout is that it’s fully declarative. This factor is quite critical, especially when building complex applications. So, without much delay, let us add some awesome animations to your applications using MotionLayout in Android:
The first step is to add the below-given dependency to your application’s build.gradle file:
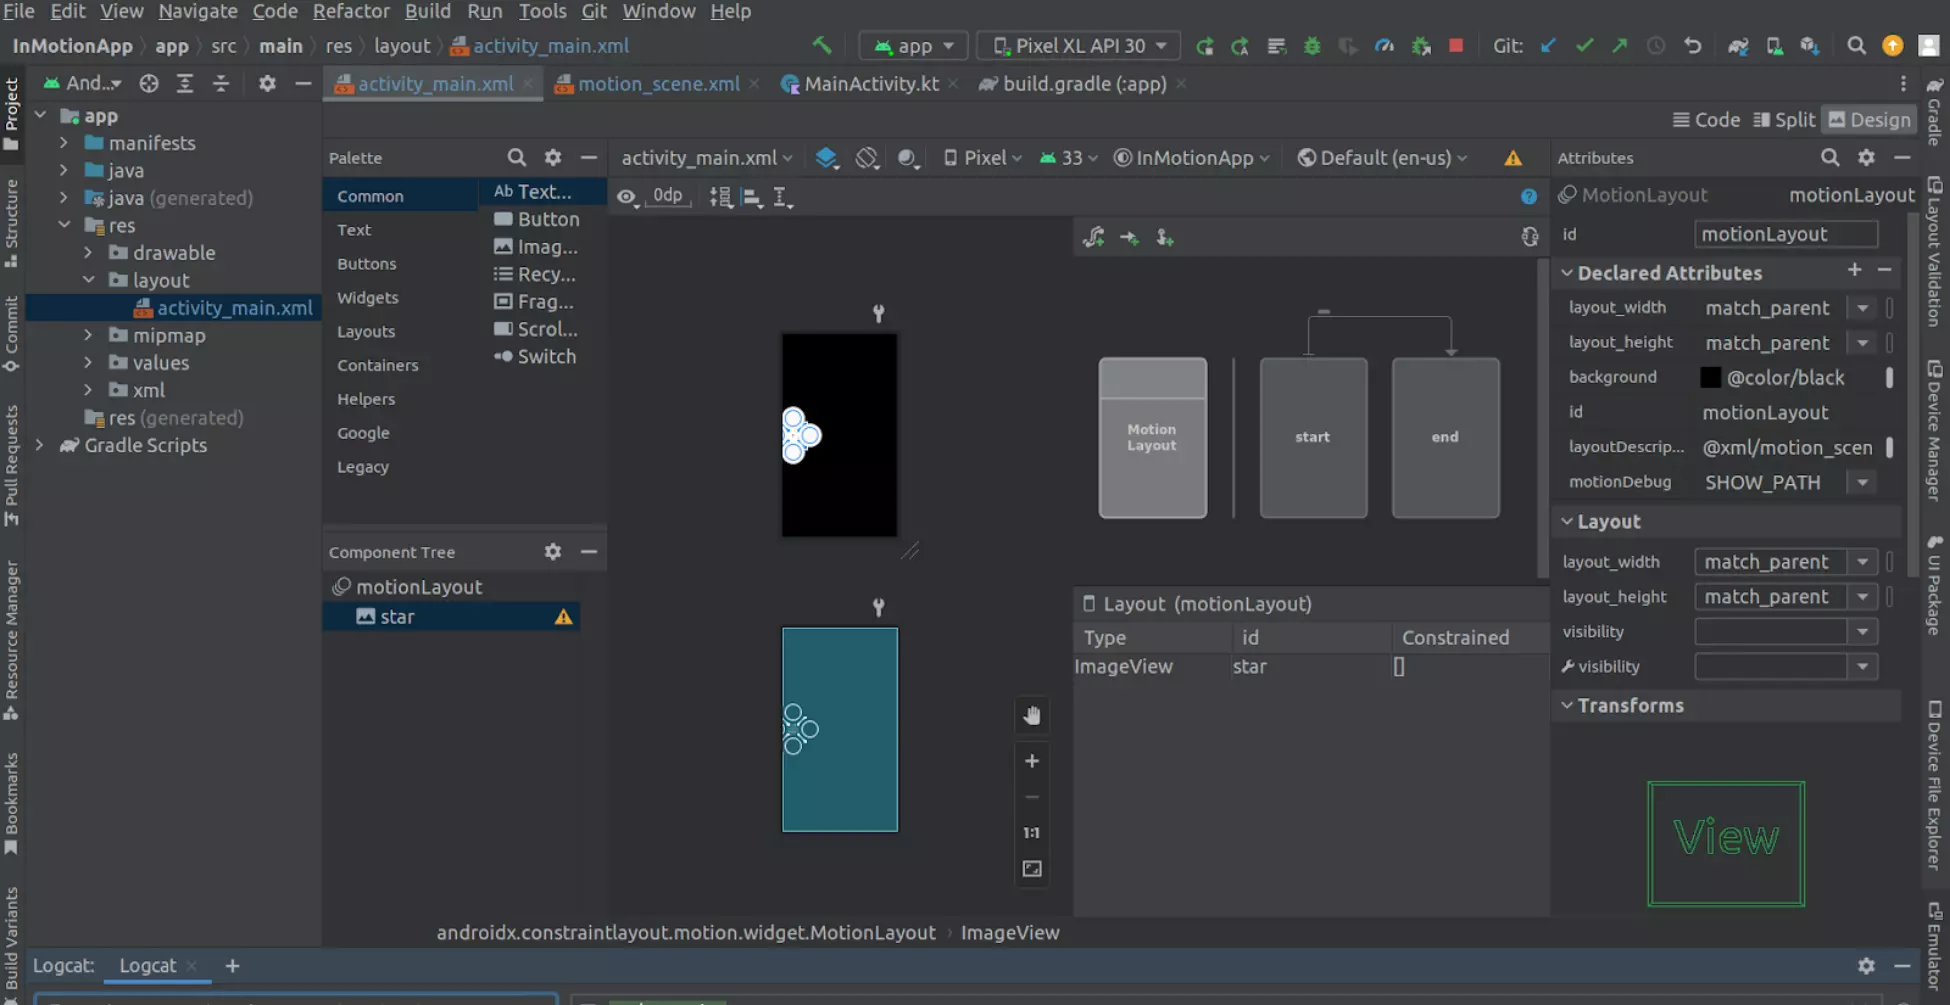
Then, create a MotionLayout in your XML layout file and define the start and end states of the animation using ConstraintSets. As per the example given below:

<?xml version="1.0" encoding="utf-8"?>
<!-- activity_main.xml -->
<androidx.constraintlayout.motion.widget.MotionLayout
   xmlns:android="http://schemas.android.com/apk/res/android"
   xmlns:app="http://schemas.android.com/apk/res-auto"
   xmlns:tools="http://schemas.android.com/tools"
   android:id="@+id/motionLayout"
   android:background="@color/black"
   android:layout_width="match_parent"
   android:layout_height="match_parent"
   app:layoutDescription="@xml/motion_scene"
   app:motionDebug="SHOW_PATH"
   tools:showPaths="true">

   <ImageView
       android:id="@+id/star"
       android:layout_width="wrap_content"
       android:layout_height="wrap_content"
       android:src="@drawable/ic_star"/>

</androidx.constraintlayout.motion.widget.MotionLayout>
In the code above, we define two ConstraintSets (start and end) that represent the start and end states of the animation and a view that we want to animate.
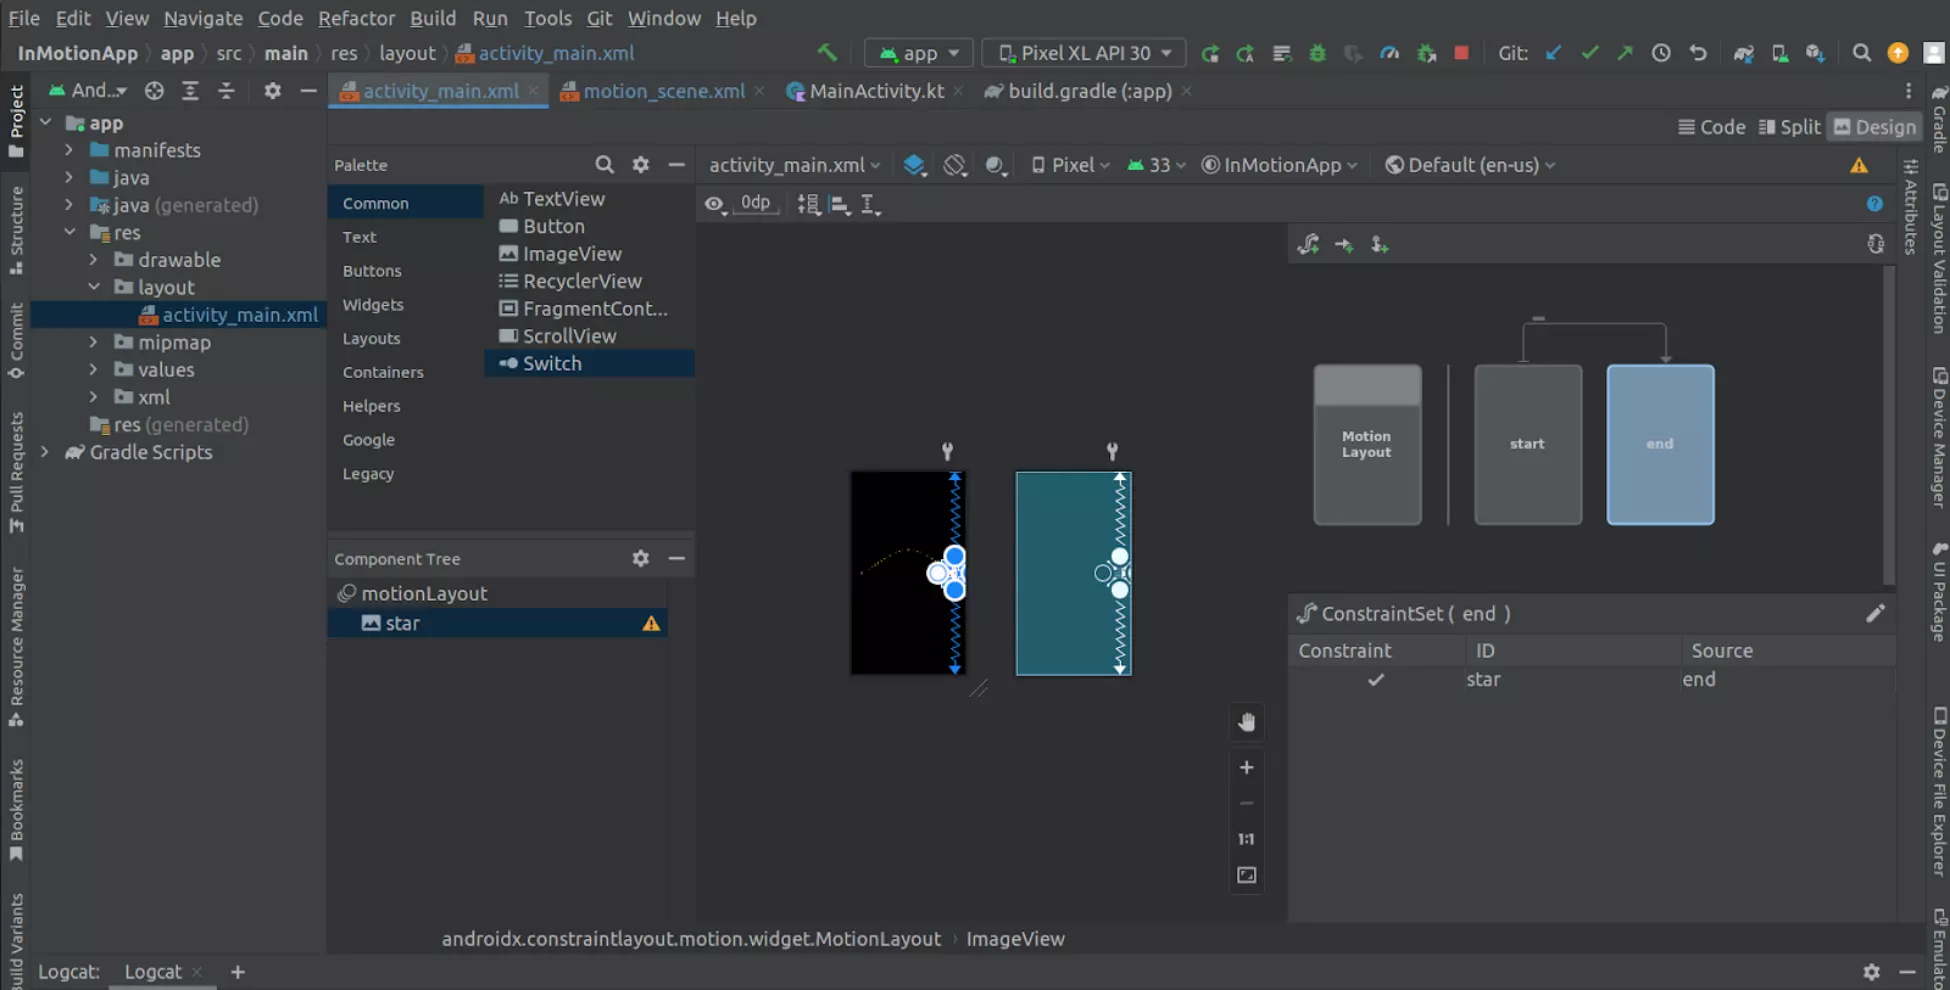
Create a motion_scene.xml file in Res > XML folder that defines the animation. In this file, you can define keyframes that specify the different states of the animation and the transition between those states. Check out the code below:

<?xml version="1.0" encoding="utf-8"?>
<MotionScene
   xmlns:android="http://schemas.android.com/apk/res/android"
   xmlns:motion="http://schemas.android.com/apk/res-auto">

   <Transition
       motion:constraintSetStart="@+id/start"
       motion:constraintSetEnd="@+id/end"
       motion:duration="1000"
       motion:motionInterpolator="linear">
       <OnSwipe
           motion:touchAnchorId="@+id/star"
           motion:touchAnchorSide="right"
           motion:dragDirection="dragRight" />

       <KeyFrameSet>
           <KeyPosition
               motion:keyPositionType="pathRelative"
               motion:percentY="-0.25"
               motion:framePosition="50"
               motion:motionTarget="@id/star"/>
       </KeyFrameSet>
   </Transition>

   <ConstraintSet android:id="@+id/start">
       <Constraint
           android:id="@id/star"
           android:layout_width="wrap_content"
           android:layout_height="wrap_content"
           android:src="@drawable/ic_star"
           android:layout_marginStart="8dp"
           motion:layout_constraintBottom_toBottomOf="parent"
           motion:layout_constraintStart_toStartOf="parent"
           motion:layout_constraintTop_toTopOf="parent">
           <CustomAttribute
               motion:attributeName="BackgroundColor"
               motion:customColorValue="#FFEB3B"/>
       </Constraint>
   </ConstraintSet>

   <ConstraintSet android:id="@+id/end">
       <Constraint
           android:id="@id/star"
           android:layout_width="wrap_content"
           android:layout_height="wrap_content"
           android:src="@drawable/ic_star"
           android:layout_marginEnd="8dp"
           motion:layout_constraintBottom_toBottomOf="parent"
           motion:layout_constraintEnd_toEndOf="parent"
           motion:layout_constraintTop_toTopOf="parent">
           <CustomAttribute
               motion:attributeName="BackgroundColor"
               motion:customColorValue="#F53224"/>
       </Constraint>
   </ConstraintSet>

</MotionScene>
MotionLayout and ConstraintLayout differ in their XML structure as in MotionLayout description of Animation is stored separately in a MotionScene XML file meaning the layout file only contains the Views and their properties rather than their positioning or the movement. For effectively using the MotionLayout, it is crucial to understand the key terms such as:
Define starting the translation of the layout as below:

Define ending translation of layout as below:

In this example, we define a single Transition that specifies the start and end ConstraintSets. Also, we added custom attributes in the constraint set to change the color of the view from start to end.
Finally,; we apply the animation to the Motion Layout by adding app:layoutDescription=”@xml/motion_scene” to MotionLayout in activity_main.xml file.
They refer to the changes that occur in animation over time. When creating animations in MotionLayout, you can use these interpolated attributes to define how an element moves, changes size, or rotates over time.
These attributes are not defined by default in MotionLayout; but can be added by the developer. These attributes can be used to set custom view properties, such as colors, fonts, or animations. To use custom attributes in MotionLayout, you must define them in your layout file first.
To define a custom attribute, you can use the “CustomAttribute” tag in your XML layout file as below.
MotionLayout in Android apps should consider the intent to help users understand what the app is doing. The Material Design website offers valuable insights into effectively using Android MotionLayout for your application. MotionLayout is an advanced tool for creating engaging animations and transitions in Android applications. Although it can incorporate pre-defined content animations that don’t require user interaction, MotionLayout is not precisely for handling them.
To use MotionLayout effectively, developers need to define keyframes and constraints, which can be challenging to master. The resulting user experience can be well worth the effort and significantly impact the app’s competitiveness; however, if you are also a business owner looking for experts who can guide you through your Android Application Development process. Then, the best Mobile App Development Company, like Bacancy, can help you make the right choice and move forward with the next step in your Android app development.
Your Success Is Guaranteed !
We accelerate the release of digital product and guaranteed their success
We Use Slack, Jira & GitHub for Accurate Deployment and Effective Communication.