This blog is all about Interceptor. In this blog, you will learn many things about the Interceptor for angular and how to use it in your existing Angular project. I am delighted to share my knowledge, so let’s dig in.
Here you go.
Interceptor is one of the essential features of Angular. Being an Angular developer, I need to learn about the things that are related to Angular.
Table of Contents to be covered:-
(1) Introduction of Interceptor.
(2) Implement Interceptor in Angular.
- Create an Injectable service file and implement the HttpInterceptor interface.
- Import inside the providers’ array inside the app.module.ts.
- Create Fake Http request for checking of the interceptor.
(3) How to use Multiple Interceptors in Ng8.
(4) Use Case of Interceptor.
- Manipulating the URL
- Loader
- Converting or Fake backend
- Headers
- Notifications
- Errors
- Authentication
- Code optimization
(5) Important link
1. Introduction of Interceptor.
Basically, Interceptors are like if you want to keep your eyes in each and every API call, then you must use Intercepto.
Basically, the interceptor used to handle an HttpRequest or HttpResponse.
It is not precisely a middleware but we can say it is middleware.

Interceptor is like if you want to perform something when you are calling API, then you can use Interceptor.
But having many things can be done by using an interceptor.
2. How to Implement Interceptor in Angular?
Let’s start the session:-
To implement an interceptor, we need to create 1 file and provide it in-app modules…
Create an Injectable service file and implement the HttpInterceptor interface.
Create a Typescript file inside the src folder called alert-interceptor.ts and write the below code inside that file. We can say This is the basic code required or format of that file.
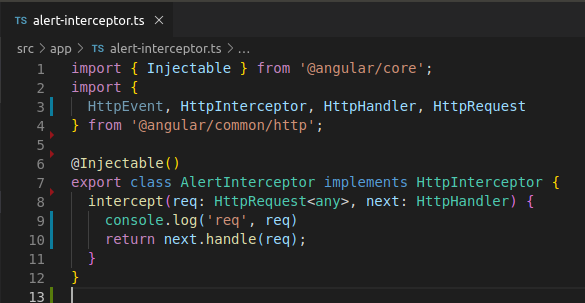
Import inside the providers’ array inside the app.module.ts.
Now add this file into the app.module.ts inside the providers’ array, as shown in the below image.
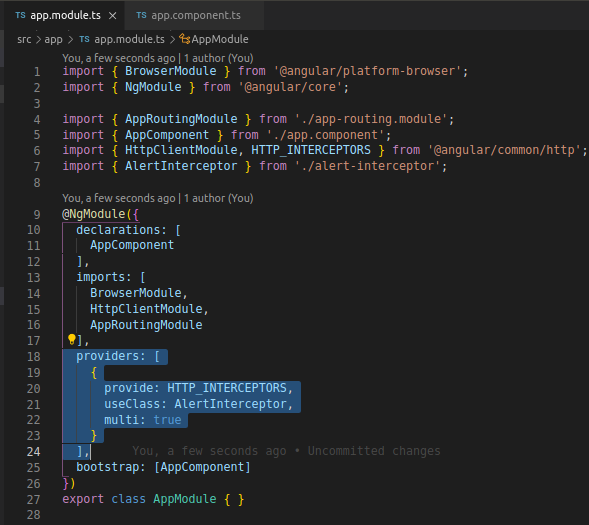
Now the interceptor is working; you can test on using fake API calls like.
Create a Fake Http request for checking of the interceptor.
Below is the basic setup for more comfortable with this blog and for more understanding, so just write below code, then we will go forward.
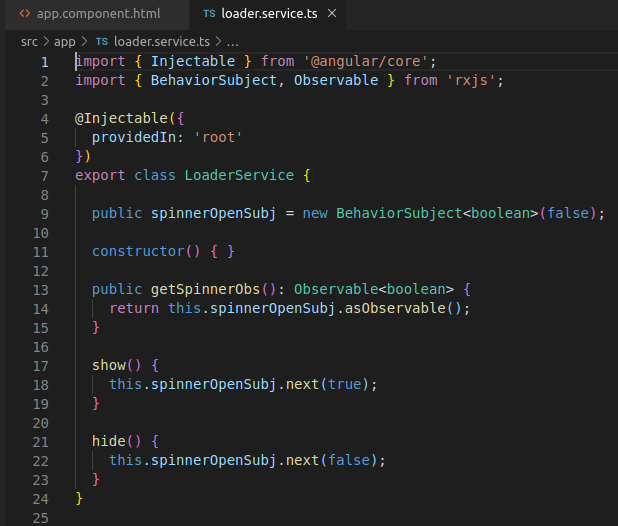
Create a service which is for loader call loader.service.ts
Now go to the terminal and write the below command.
Command: – ng g s loader
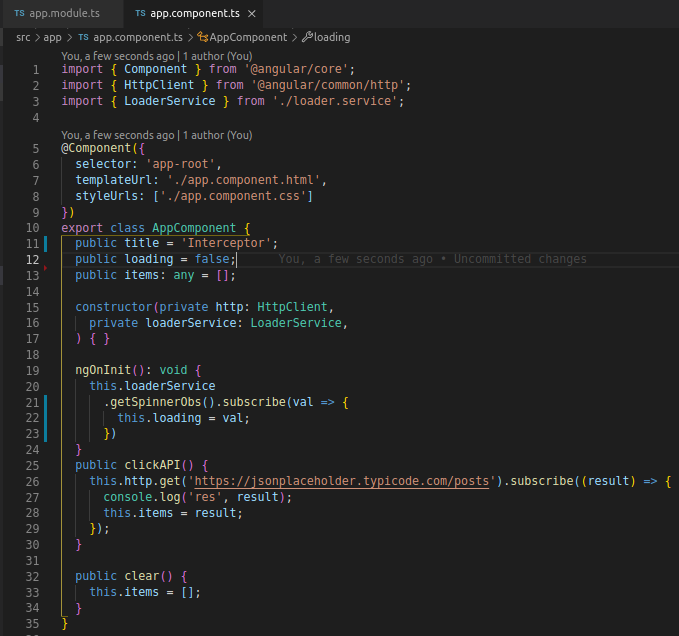
The above command will create a loader service, and then we can use it in our app.component.ts.
App.component.ts
App.component.html
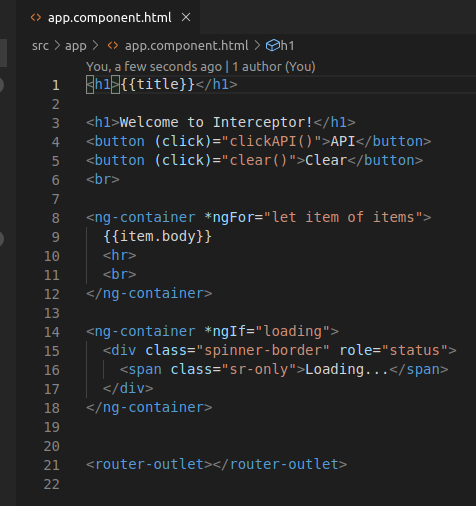
And once you click on API, you will see the console.log of req into the interceptor.
Output:
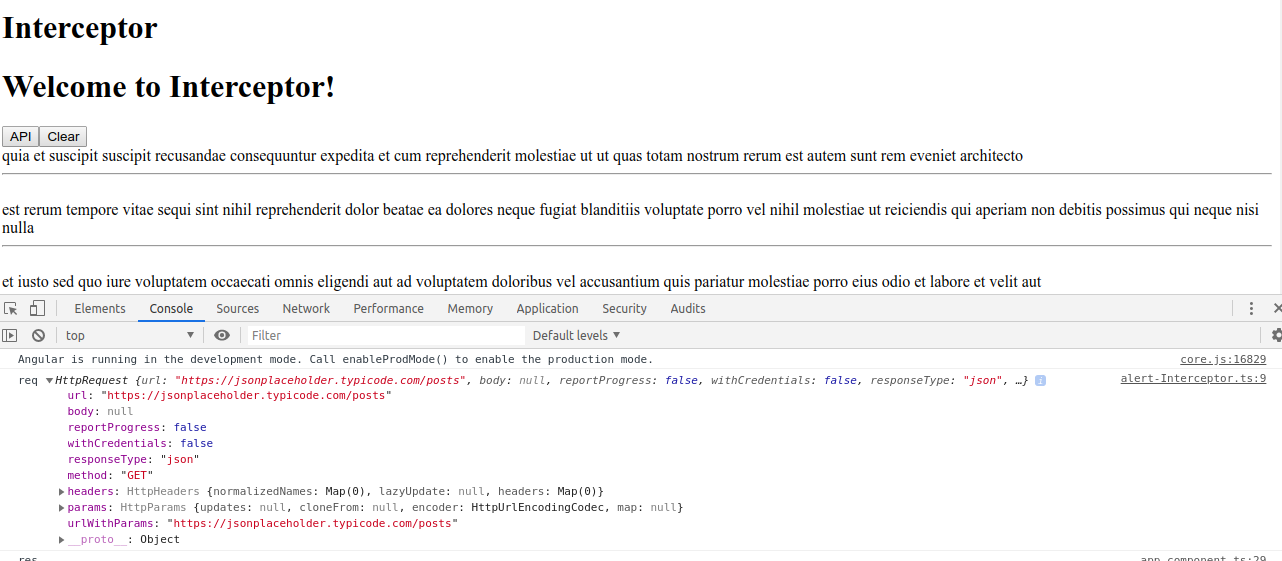
3. How to use Multiple Interceptors in Ng8?
:- YES
:- For that, we need to repeat the above process
:- Need to create a new typescript file for the interceptor
:- Provide it into the app module provides Array.
:- Now you can use that interceptor too
4. Use Case of Interceptor.
There are many ways to use the interceptor in the project.
1. Manipulating the URL
Using the interceptor, we can Manipulate the URL from HTTP to https something like,
  const authorizedRequest = req.clone({
     url: req.url.replace("https://", "http://"),
   });
Add above code into alert-interceptor.ts
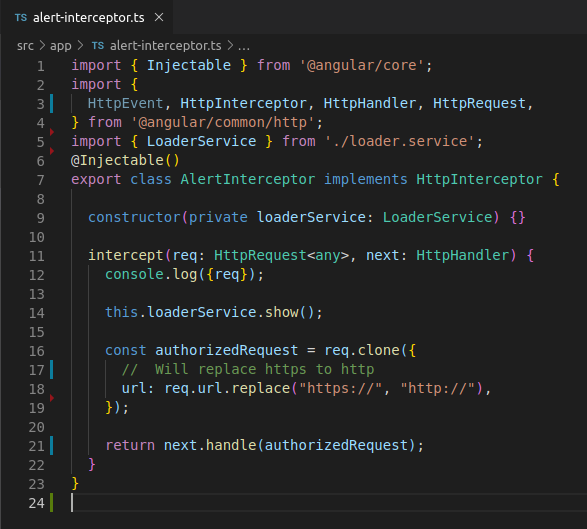
After that, you can see HTTP instead of https into the network console
Output:

2. Loader
Using the interceptor, we can show and remove loader for all the API calls at 1 place instead of writing the code on all the API calls.
 this.loaderService.show();

   return next.handle(req).pipe(
     finalize(() => this.loaderService.hide())
   );
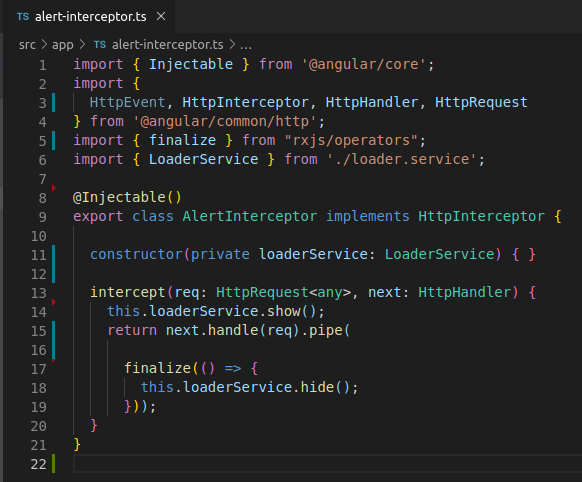
Output:-

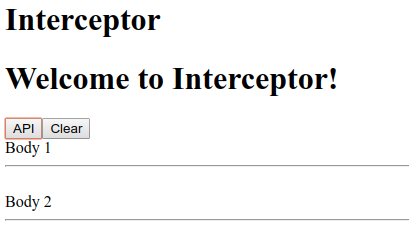
3. Converting or Fake backend
Using the interceptor, we can modify the response.
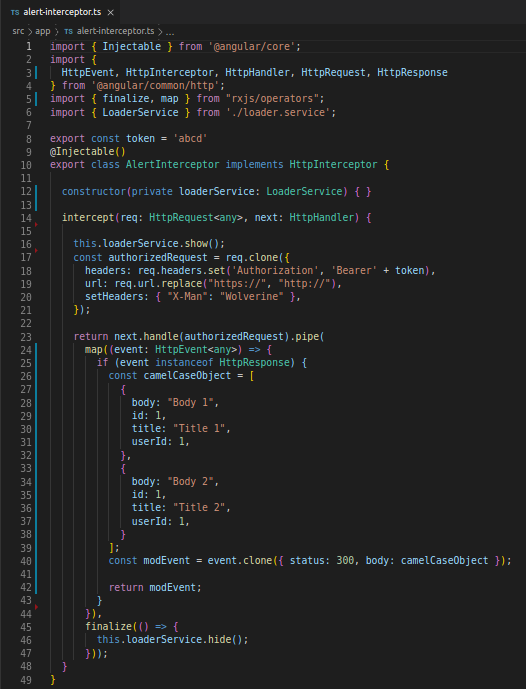
Output:
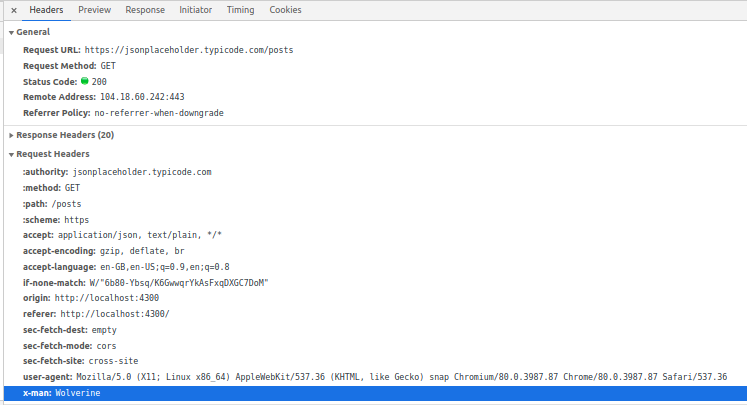
4. Headers
Using the interceptor, we add our custom headers too.
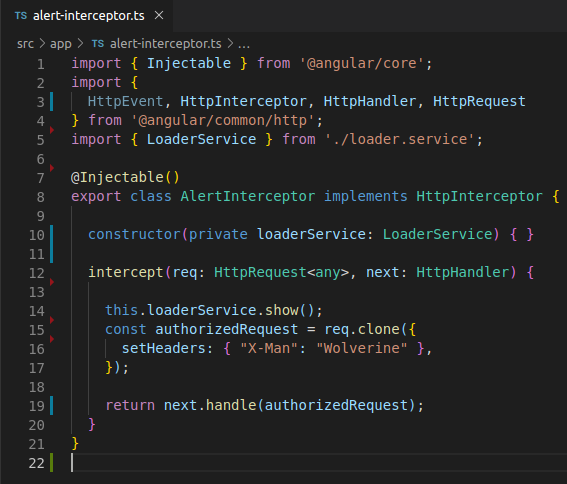
Output:
5. Notifications
Using the interceptor, we can show notification based on the status code or responses.

Output

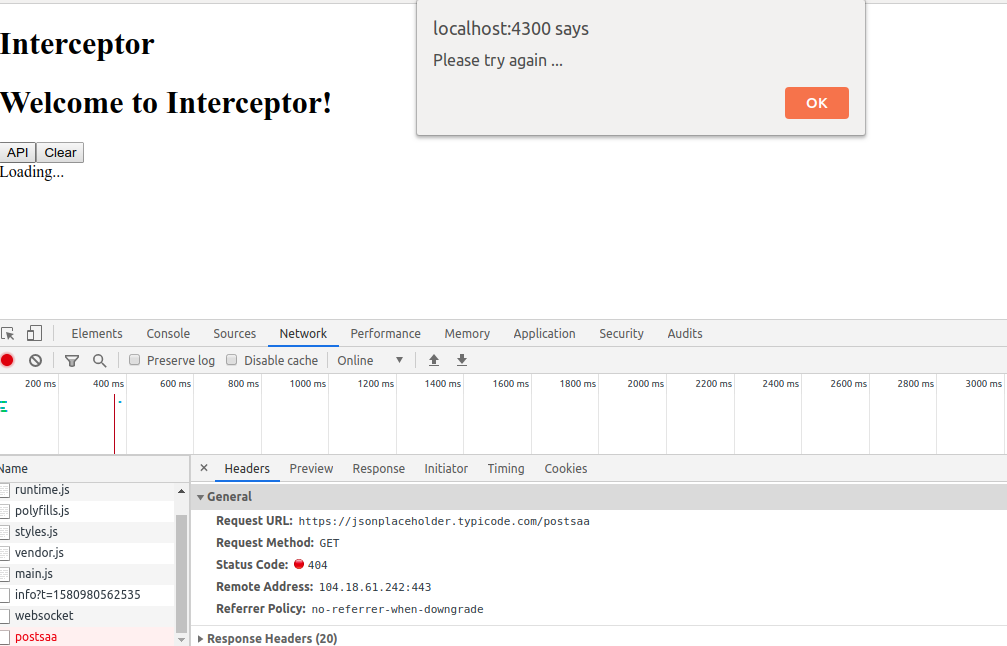
6. Errors
Using the interceptor, we can show an error, which is like internal server error or something.

Output
7. Authentication
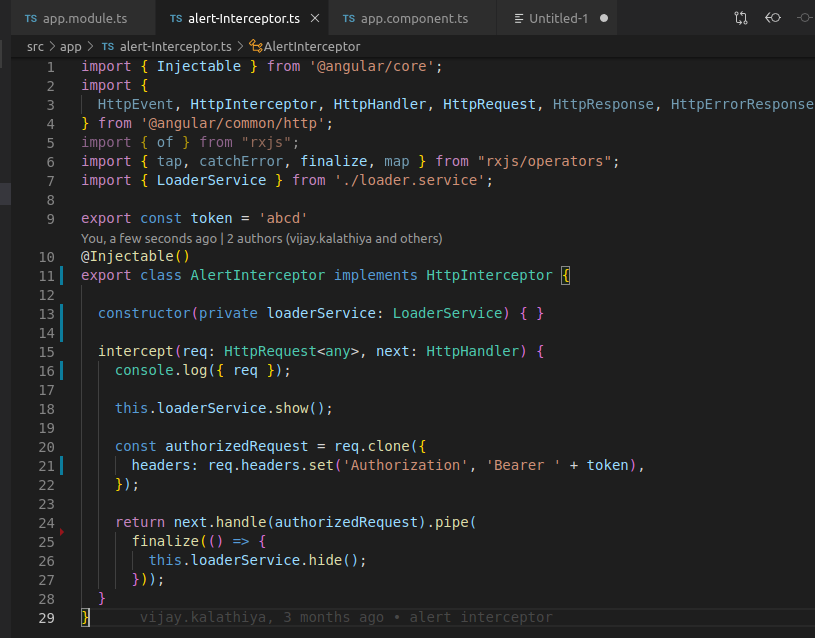
Add bearer token…
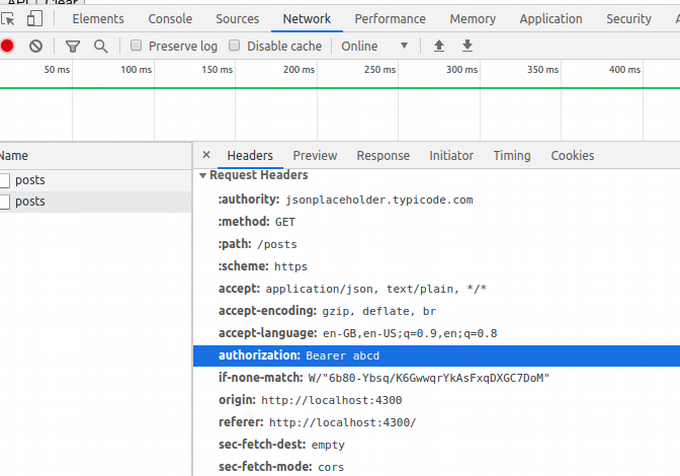
Using the interceptor, we can add a token for identifying or maintaining the session of the user.
We just need to write the single code time and only at 1 place instead of writing code for every API.
Output
8. Code optimization
Interceptor also works as a code optimization….
As we learn in this blog, we just need to write the code related to Token, Header, notification for internal server error, Show spinner while waiting for Response, and many more. So in that case using an interceptor, we just need to write the code only inside the interceptor file instead of writing the code for every API.
Important link:
Github repository:- github.com/parthsardhara/NG-Interceptor
Stackblitz Link:- http://stackblitz.com/github/parthsardhara/NG-Interceptor
For the project setup:
(1) Go to the terminal and clone the project.
(2) go inside the folder and install node packages.
(3) run the angular project
So, this is all about the interceptor. I hope it will be helpful. In case you are planning to hire Angular developers to identify what other possibilities could be explored, then get in touch with us today.
If a case of doubts, feel free to comments below.
By the Way Angular Moves to Ivy, did you get the chance to have a look at what’s new in Angular Ivy version 9?
I will definitely assist you with that. See you in the next blog.
Have a good day.


