It’s been 3+ years since I have been working on Angular. From AngularJS to Angular 8, I have served my expertise on different Angular projects; meanwhile, I have used many different third-party packages(libraries). But each library has its interface. Suppose you want to extend that library feature by creating your library, thanks to the Angular team, as they provided the features to build your very own library. I am writing this blog to make you understand how you can create your project library.
Table of contents:
3. Create your Angular Library
5. Understanding the Project Library structure
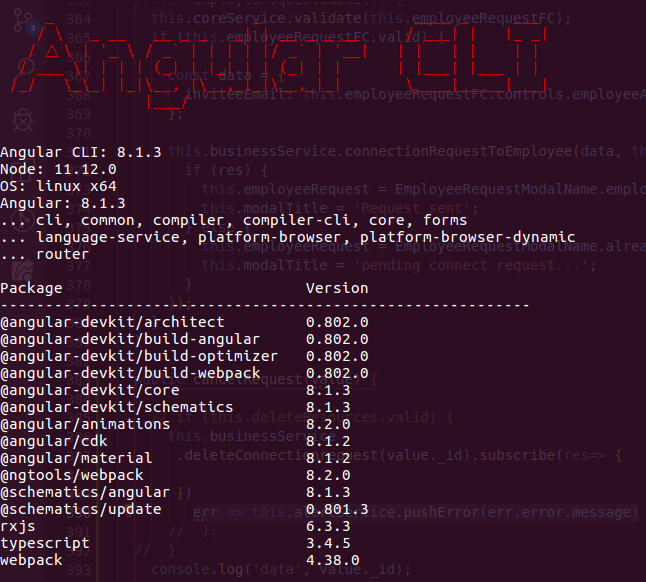
The version I have used for this demo:

Note:Note: If you have not installed the AngularCLI, I would like to request you to open a terminal and type.
npm i -g angular-cli
Introduction: Angular CLI
Angular CLI helps to create a new workspace for us at the time of using `ng new`
In our workspace, we will have two projects:
- A library project
- An application project
It is the library of components and services that we want to provide. This is the code which we will publish to npm, for example.
It will be only used to create Angular component library; Sometimes, it can be used as documentation and example usage of the library.
Process
- Create a new workspace with the name `ng-components-app` using Angular CLI
- ng-components-app is the test application for testing our library: ng-components-lib
- Generate Angular library with named:`ng-components-lib` using `ng g library ng-components-lib` command
- Our Generated library will have the prefix of uic to identify our library.
- For testing our library ng-components-lib, We will import ng-components-lib as
- After completing the above steps, we will generate project build and then use the library in another angular project
a library into our ng-components-app application.
Create an Angular Library
Now let’s create Angular Workspace and then create the project Library by using the below command:
ng new components-app --style=scss --create-application=false
cd components-app
ng g library components-lib --prefix=uic


Notice: we used the –prefix flag to make our library components to be distinct. If we do not use it, then Angular CLI will take `lib` by default.
ALWAYS: keep the habit of using a prefix when generating a project library.
Now, let’s understand what generated library command will do:
- Will add a new `components-lib` project in angular.json file.
- Will add `ng-packagr` dependencies to our package.json
- Will add a reference to the `components-lib` build path in tsconfig.json
- We will create sources for our library in `projects/components-lib` folder.
The `projects/components-lib` folder inside our application contains a component and a service inside a NgModule. Our Application’s angular.json is updated with a project of type of ‘library.’
You may also like to read; Top Angular Component Libraries
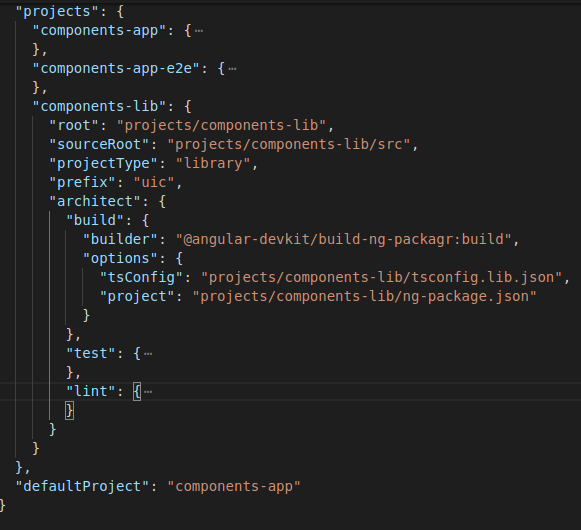
Updated angular.json of components-app after Generate Library

Let’s learn the key elements of “projects” to be generated in angular.json :
Root: It points to root folder of our library projects.
Sourcebook: It points to the root of our library’s actual source code.
project-type: It specifies this is a library as opposed to our other two projects, which are of the type: application.
Prefix: The prefix identifies that we will use in the selectors of our components. Remember, we specified ‘uic’ when we generated the library.
Architect:It specifies how Angular CLI can handle build, test, and lint for our project. In this section, the builder makes use of ng-packagr for building.
The dependency of ng-packagr in package.json
When we start to generate the library, Angular CLI realizes that it needs ng-packagr. So, `ng-packagr` added into our devDependencies in our workspace package.json: “ng-packagr”: “^4.1.0“,
Understand `components-lib` Library sources
In library “Project” folder, Angular CLI created a new module with a service and a component inside the “projects/components-lib/src/lib” folder. Also, there we can see another few more files:
public_api.ts
This is called the entry file. It determines what parts of our library are visible externally. In our application, we will export only our library parent module: `ComponentsLibModule`
package.json
This package.json file exists inside /projects/components-lib` folder specially for our library. This file will get published with our library as an npm package. When the developer installs our library using npm, it will install the dependent packages specified in package.json ng-package.json: configuration file of ng-packagr.
Now we will export the library parent module `ComponentsLibModule` in public_api.ts file. And after then we will import it to our application `src/app/app.module.ts’ file for testing.
How to Build our Library
Let’s create build of newly generated library by using below command:
ng build components-lib
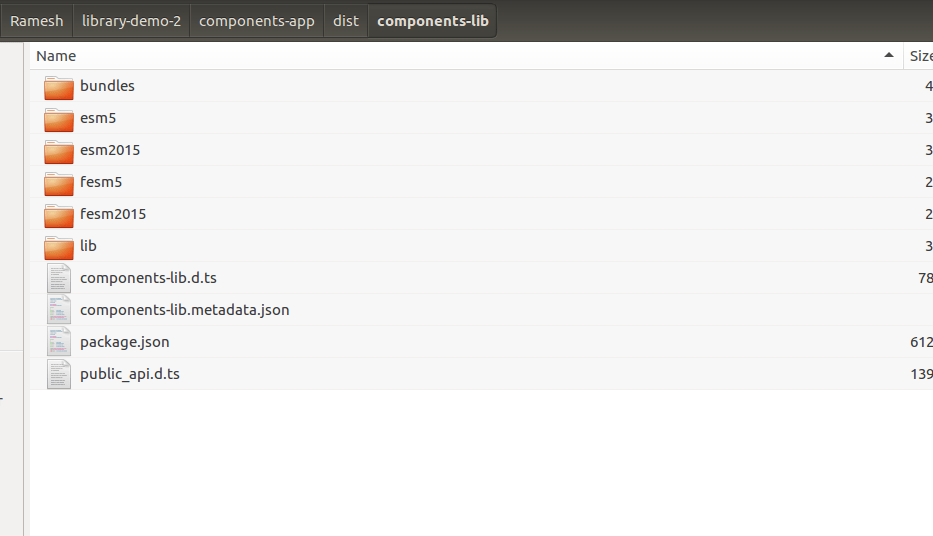
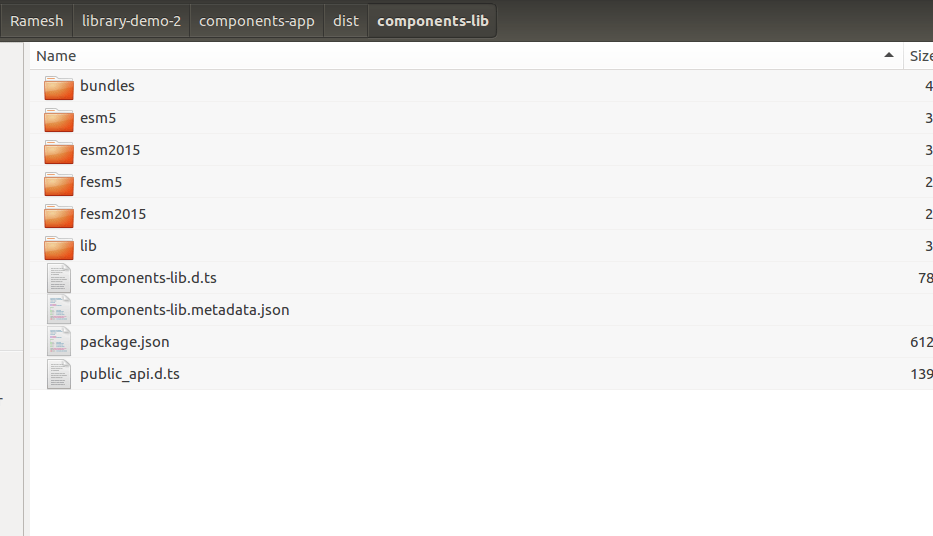
It builds our library to the folder:
components-app\dist\components-lib

Testing Library in Application
We have created a workspace with the name `components-app,` which will now use to test our generated library.
Now we want to test our generated `components-lib` library is working successfully or not. For that, we will import `components-lib` as a library into our `components-app` application.
Import Library Module into the Application Module
Here we will display the default component that Angular CLI created for us in the library that is `components-lib.component.ts` file.
In `components-lib.module.ts,` exports the `components-lib.component.ts` file.

Now, Import `ComponentsLibModule` inside `src/app/app.module.ts’ file as per the below screenshot.

Note: we should have to export the `components-lib.module.ts` file from `public_api.ts` file
For Example, open `public_api.ts` file and export library module as per the below-mentioned code:
export * from ‘./lib/components-lib.module’;
Displaying the ‘components-lib’ Component
We are going to add the default generated component from our library into our AppComponent template: app.component.html (Main Application Component).
Please go through the app.component.html file and put the selector of the `components-lib.component.ts` file as shown in the screenshot below.

Run an Application
Now simply run the application using `ng command; if it runs successfully that means library project structure has been successfully created.

Excellent. It is running successfully? We successfully created an angular 8 library.
Happy coding.
Please feel free to comment below if you need any further assistance.
In the next session, We will learn about `How to use Generated library in another Application’.
Leverage Expertise of our Full-stack AngularJS Development Team
Hire our Angular Developers Now!
Conclusion
So, this was about how to create an Angular Library. I hope the tutorial helped you the way you expected. For learning more about Angular, please feel free to visit Angular Tutorials.
At Bacancy, we have dedicated and enthusiastic Angular developers.
Are you looking for Angular developers? If yes, then without wasting a second, contact Bacancy and hire Angular developers.
FAQs
-
What is NPM and NG?
NPM (Node Package Manager) is a dependency provider mainly used to manage all packages. It is a hotspot that offers us all the required packages. On the other hand, NG is Angular’s core module. Whenever an Angular app starts, the very first module to be loaded is – NG.
-
What is an Angular library?
A library is defined as a collection of directives, components, precompiled routines that can be used across various projects. The Angular library is an Angular project with the limitation of not running it on its own. It has to be imported first and then later we can use it.
-
What is the difference between ng serve and ng build?
The ng serve is used for fast and local developments. Without generating an output folder, unlike ng build, it builds the artifacts from the memory for fast development.
The ng build command is used to build the application and deploy the artifacts. It builds an output folder: dist/. The command will generate the output files only one time and won’t serve them.


