How to Integrate Authentication using AWS Amplify in Flutter: Complete Guide
Last Updated on June 3, 2024
Have you ever got the client requirement of integrating authentication using AWS Amplify in Flutter? Are you stuck and figuring out where to start? Or, are you just a curious flutter enthusiast who wants to learn how to authenticate your flutter application using AWS amplify? If yes, then we are here to help you! Here is aws amplify tutorial where we will provide a complete guide to authenticate the flutter application using AWS amplify. We will cover both technical and theoretical sections. So, without further ado, let’s get started!
AWS Amplify authentication is a collection of tools, features, and libraries that helps to build and host web applications and mobile apps on AWS. Amplify supports various frameworks & platforms like JavaScript, Vue, Next.Js, and mobile platforms like IOS, Android, Flutter, React Native, Ionic. AWS amplifies the used bundle of User Interface Components & CLI (Command-line interface) to build app backend for web & mobile apps.
Cross-check the following prerequisites before developing and learning how to integrate authentication using AWS amplify in Flutter.
Note: The existing version of @aws-amplify/cli won’t work; you might need to install the latest flutter-preview version.
Here are a few dependencies that you need to authenticate your flutter application using AWS amplify. Just follow the instructions and commands to get it installed.
Note: The output of this command should have “-flutter-preview” appended to it. If not, run “npm install -g @aws-amplify/cli@flutter-preview” in the terminal.
So, after the installation and configuration, let’s move further in our tutorial: Integrate Authentication using AWS Amplify in Flutter.
Subside the project complexities!
Are you searching for Flutter developers with a great spectrum of knowledge? Struggles are real when you’re dealing with a complex project. We are here to help you with your hustles. Get in touch with us today to Hire Flutter Developer with fundamental and advanced knowledge.
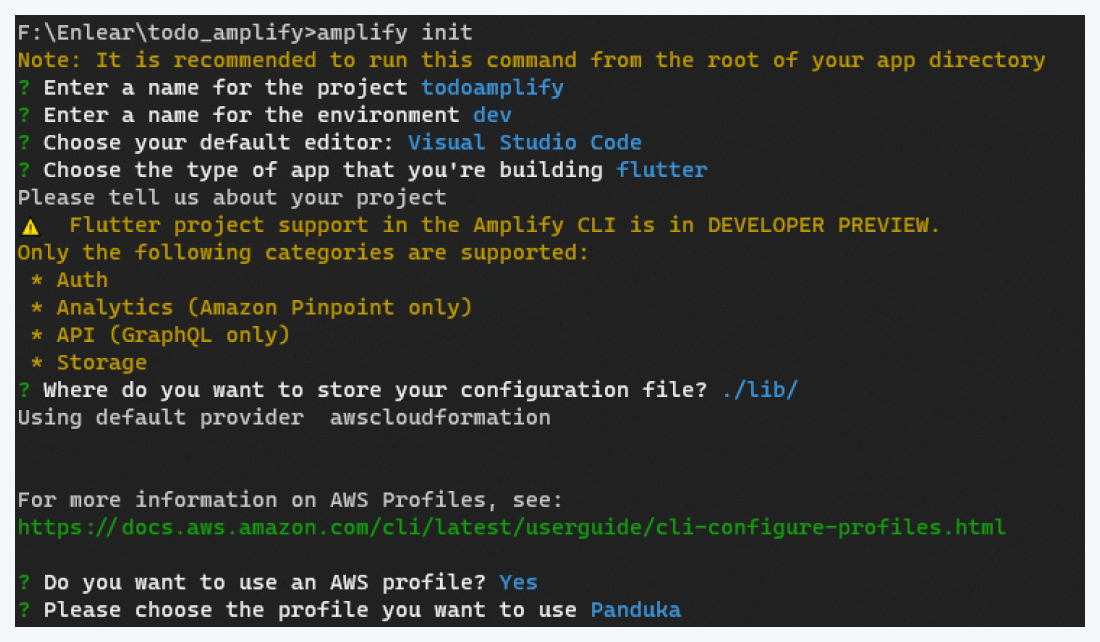
The next step is to connect to the AWS cloud, and for that, we need to initialize Amplify. Run the below command in your terminal.
Your terminal will look as shown in the below image.
Now use the command to configure the user for Flutter AWS.
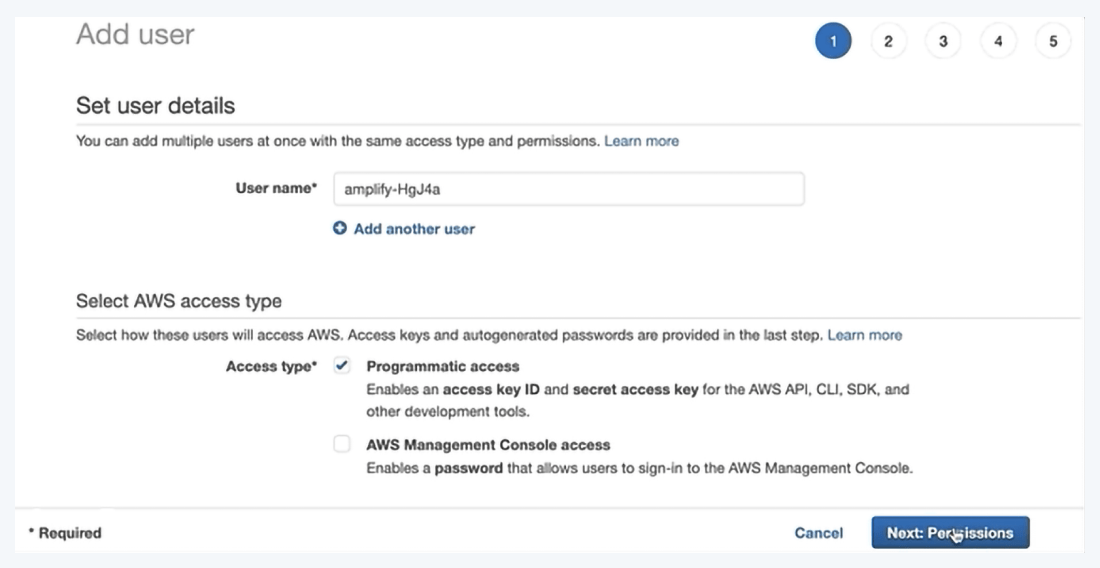
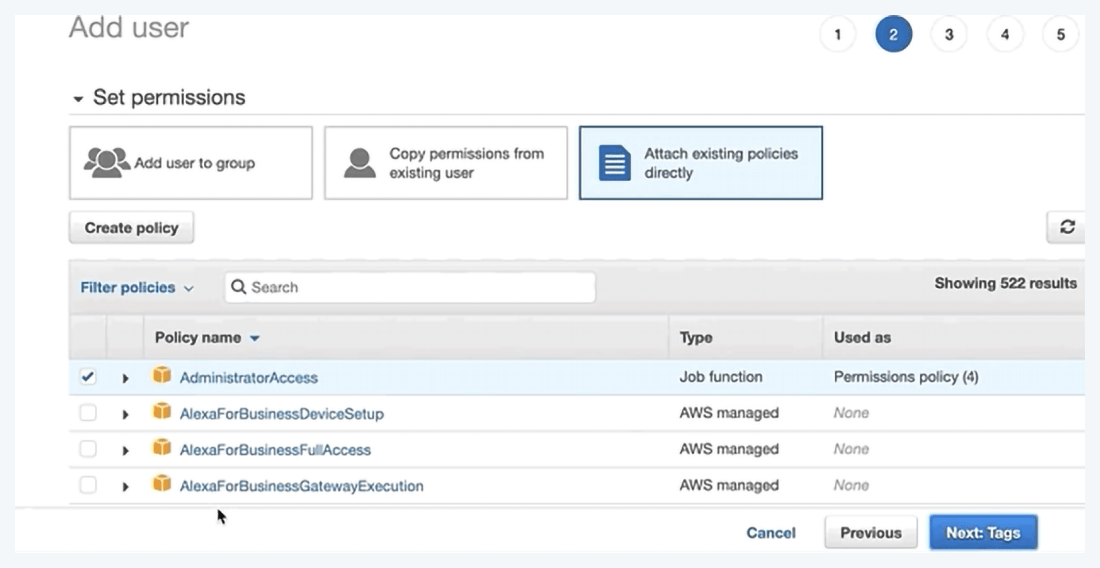
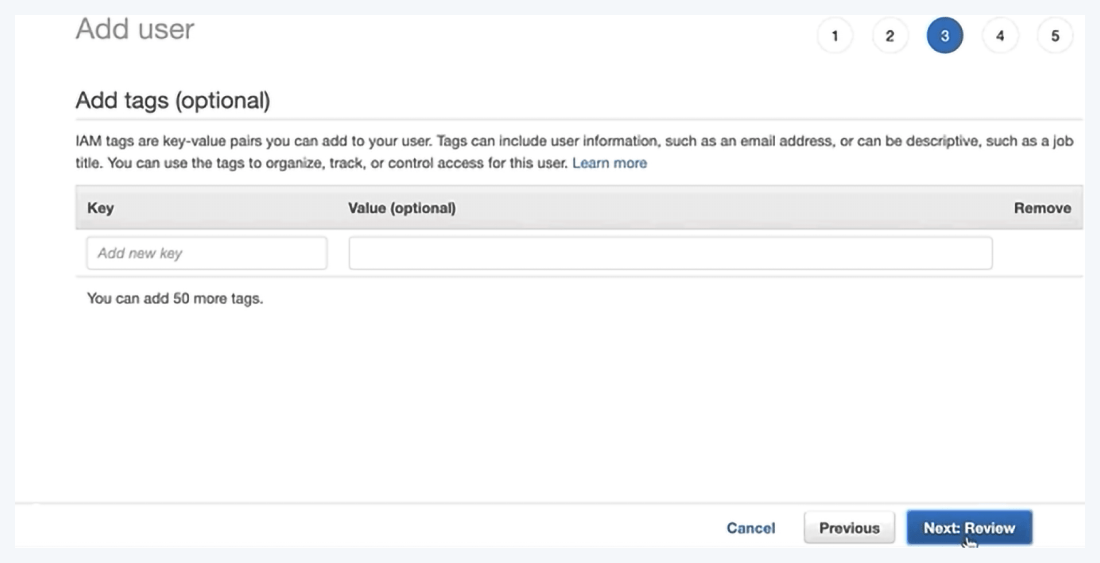
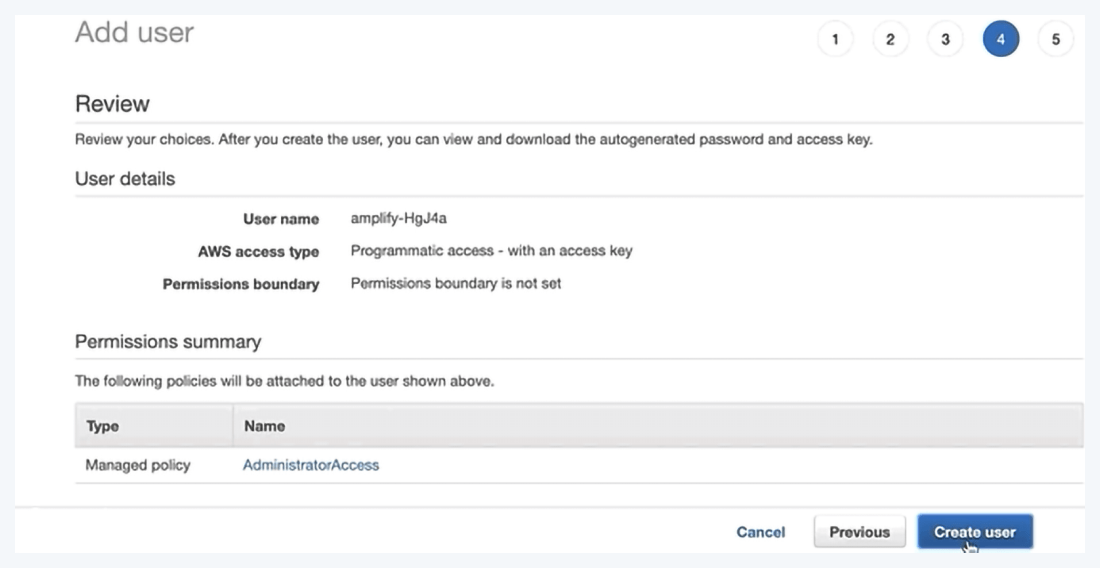
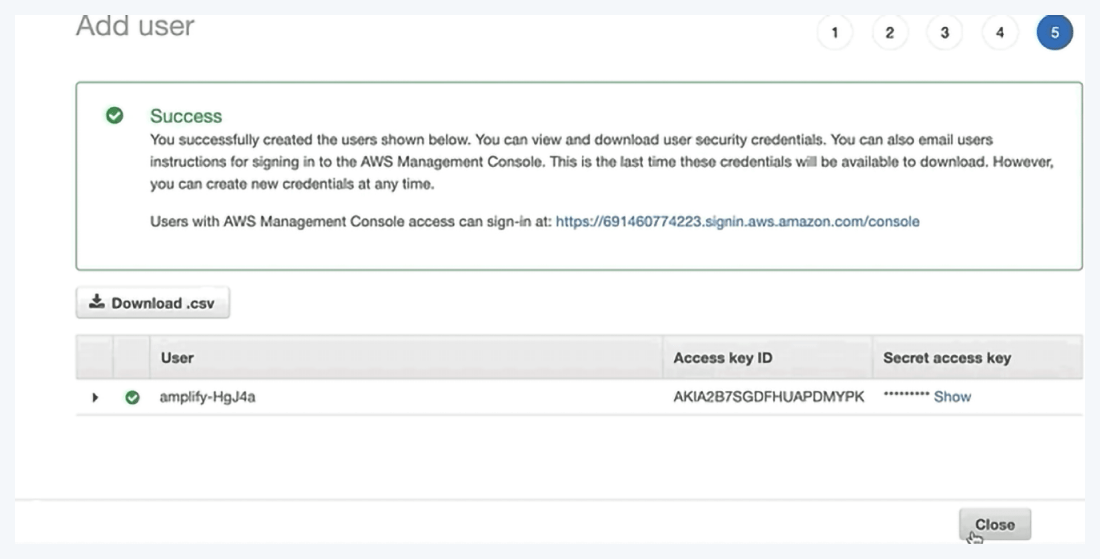
This command will help to create a new user or set an already created user for the project.
So far, we have successfully set up AWS Amplify in our project. Now let’s proceed further and get our hands-on coding part. In the below sections, we will set up Sign In and Sign Up for the users with the help of Flutter AWS Cognito.
Amazon Cognito is a simple and secure service that helps to add user authentication without much hustle to your mobile and web apps. AWS Cognito also supports social sign-in methods such as Facebook, Google, Amazon, and an enterprise identity provider SAML or Open ID Connect. This Amplify category has built-in support for the AWS Cognito.
AWS Cognito has smoothened the application experience without worrying about building, scaling, and securing.
AWS Cognito also enables us to sync data across the device so that users switch to a new or another device their experience remains consistent.
Prerequisites
Run the below command in the terminal to start using flutter amplify auth in the project.
You’ll be prompted with a few questions to configure the auth preferences; just select the defaults,

? Do you want to use the default authentication and security configuration? `Default  configuration`
? How do you want users to be able to sign in?
`Username`
? Do you want to configure advanced settings?
`No, I am done`
We need to push all the changes we have made after the auth configuration has been set. For pushing these changes, run the below command.
Transform Your Cloud Game: Elevate with Expert AWS Consulting!
Unleash the power of innovation and efficiency – our team is ready to supercharge your AWS journey. Let’s sculpt your success in the cloud with AWS consulting services!
Now, it’s time to integrate Auth into our codebase finally. I hope the authentication using AWS amplify Flutter auth was understandable so far.
Implement AWS API calls like we used to do in Firebase Auth.

try {
   Map userAttributes = {
     "email": emailController.text,
     "phone_number": phoneController.text,
     // additional attributes as needed
   };
   SignUpResult res = await Amplify.Auth.signUp(
       username: "myusername",
       password: "mysupersecurepassword",
       options: CognitoSignUpOptions(
           userAttributes: userAttributes
       ));
 } on AuthError
 catch (e) {
   print(e);
 }
Now, the user will be confirmed. For that, a confirmation code will be sent to the email address of the user. You need to create a separate UI for the confirmation code as the user has to enter the code received in his/her email and will pass it to the confirm Sign-up call.

try {
   SignUpResult res = await Amplify.Auth.confirmSignUp(
       username: "myusername",
       confirmationCode: "123456"
   );
 } on AuthError catch (e) {
   print(e);
 }
Upon the successful completion of the signup flow, you can see Confirm sign-up Succeed message on the terminal.
In the Sign-In UI, Part implements this API call.

try {
   SignInResult res = await Amplify.Auth.signIn(
     username: usernameController.text.trim(),
     password: passwordController.text.trim(),
   );
 } on AuthError catch (e) {
   print(e);
 }
Upon the successful completion of the sign-in flow, you can see the Sign in a Succeeded message on the terminal.
So, this was about how to implement authentication using AWS amplify in Flutter. I hope the blog has helped you the way you expected. For more such flutter tutorials, feel free to visit the Flutter tutorials page where you can clone the github repository and play around with the code. We always appreciate the feedback.
If you are already convinced and looking for assistance to integrate authentication using AWS Flutter, connect with us today. Being the renowned Flutter app development company, we can easy your way to play store and app store with the feature-loaded enterprise-grade mobile app without technical headaches.
Your Success Is Guaranteed !
We accelerate the release of digital product and guaranteed their success
We Use Slack, Jira & GitHub for Accurate Deployment and Effective Communication.