ChatGPT Integration with Node and Vue: The AI Chatbot Evolution
Last Updated on December 27, 2024
Quick Summary:
As technology becomes increasingly integrated into our daily lives, it’s important to consider how it will shape the future. One area that’s particularly promising is Artificial Intelligence (AI), which has become even more significant with the development of advanced AI-based applications like ChatGPT. In this blog post, we have covered the basics of ChatGPT along with the ChatGPT Integration with Node and Vue.
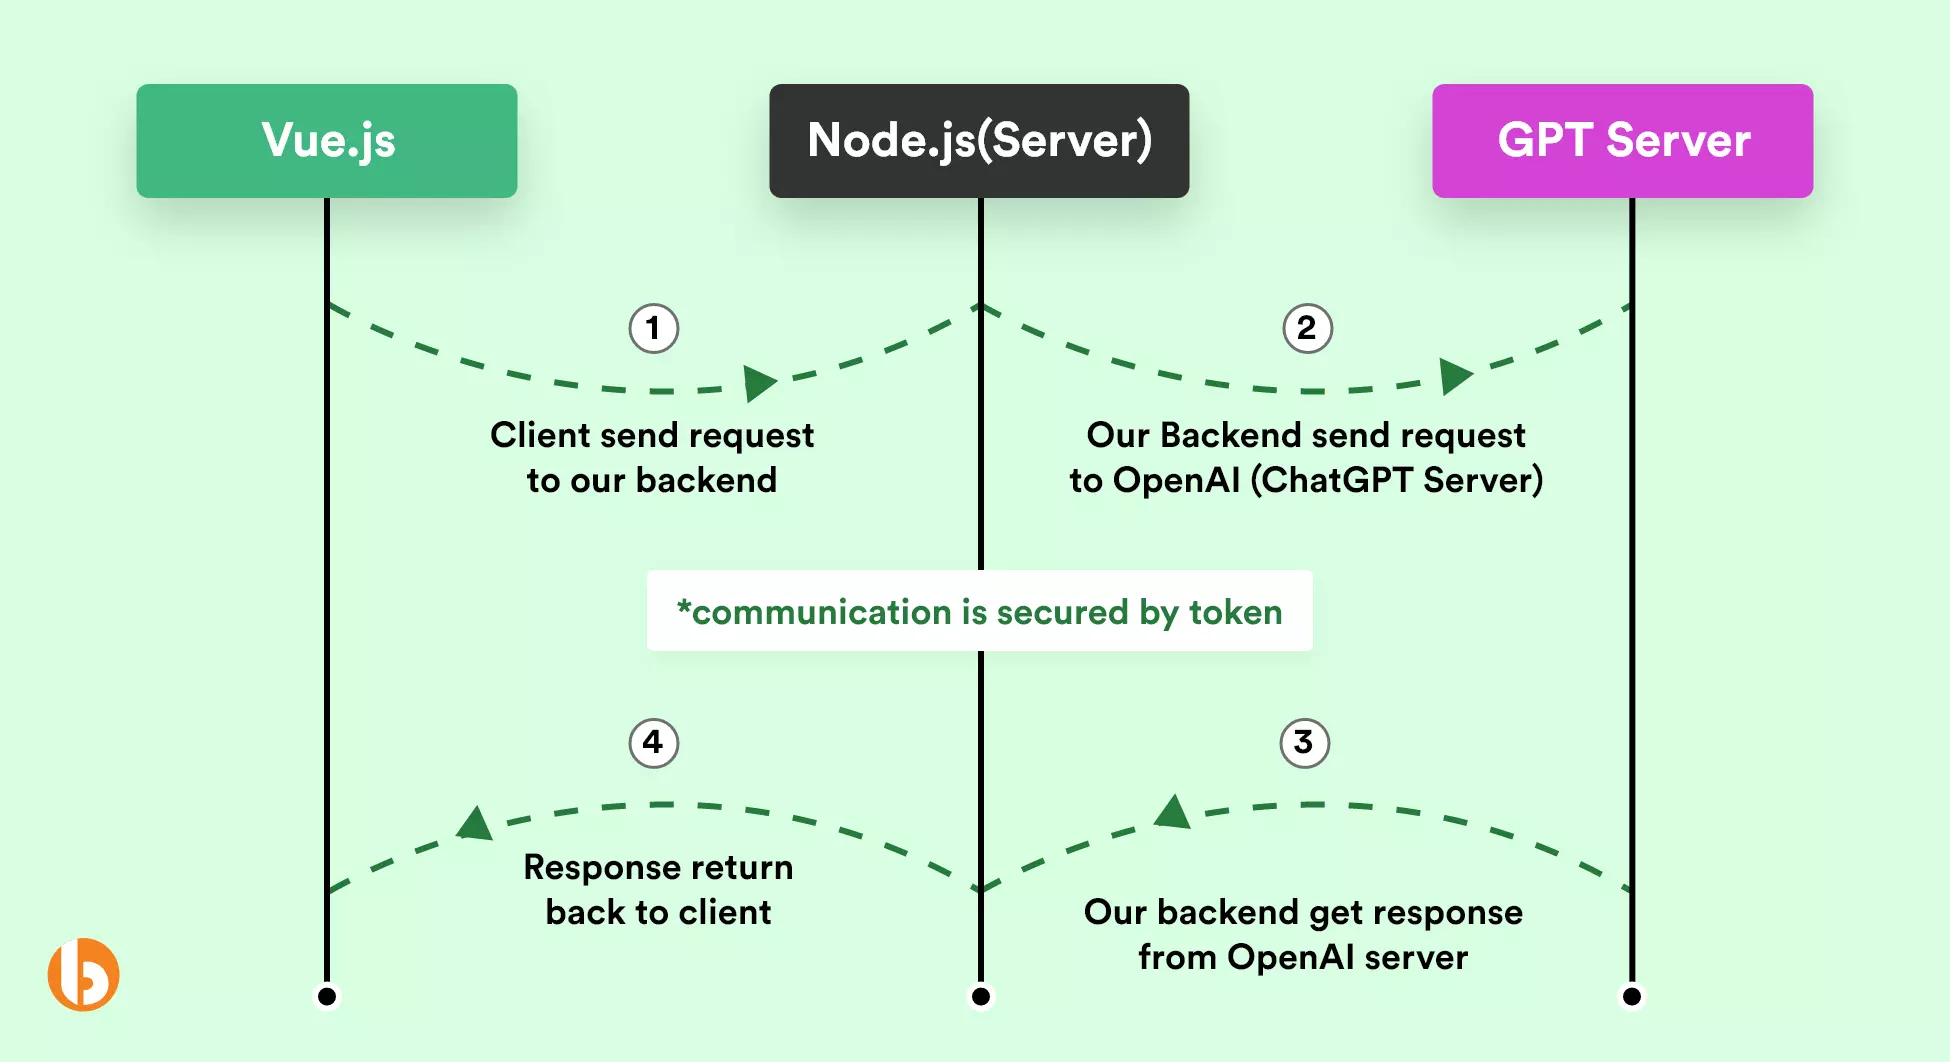
The ChatGPT tool is booming the AI industry to a significant extent with over 100 million users in January 2023, making it the fastest growing consumer application to date. The recent times have brought about a new paradigm shift within the marketplace which involves the ChatGPT Integration with Node and Vue. Moving forward with the topic let us first have a basic overview of the flow of integration with the help of the diagram given below:

Note: ChatGPT recommends that we should not store tokens in client-side instead of that use backend to request ChatGPT APIs.
Before jumping into the in-depth Flow of the ChatGPT Integration with Node and Vue let us brush up our memory on What is ChatGPT.
Node.js development allows for the creation of server-side applications using JavaScript. It leverages Node. js’s event-driven, non-blocking I/O model for high efficiency and real-time capabilities. It helps support scalable web apps, RESTful APIs, chat application microservices, and IoT systems. With its unified JavaScript stack, extensive ecosystem via NPM, and strong community support, Node.js offers performance, scalability, and ease of use, making it a popular choice for modern web development.
The Vue.js development requires building user interfaces and single-page applications using the Vue.js’s framework. It presents a reactive, component-based architecture, an HTML-based template syntax, and a virtual DOM for optimized rendering. It is suitable for dynamic SPAs and reusable UI components. Vue.js is renowned for its flexibility, high performance, and ease of learning. It supports a robust ecosystem and tools like Vue Router and Vuex, making it a great voice for modern web development.
We can refer to ChatGPT as an AI-based chatbot platform created by OpenAI which leverages the power of the advanced GPT-3 language model. GPT-3, also known as Generative Pre-training Transformer 3″ is a natural language processing model. It is trained on a vast stretch of human-generated content in a number of languages and styles.
ChatGPT uses a transformer architecture, which is a neutral network effective in processing sequential data like text. It can perform tasks like writing, summarizing, translating, questions, and answering a text making it a powerful tool for building interactive chatbots. ChatGPT allows creating chatbots that can give a natural conversation experience to users. It is customizable and easy to integrate chatbots into applications and platforms. ChatGPT enables the building of interactive chatbots that can deliver personalized user experiences.
ChatGPT API Integration NodeJS offers a comprehensive approach to the process. However, now that we have understood ChatGPT and the architecture of the ChatGPT flow of integration let us move forward with the process of ChatGPT Integration with Node and Vue.
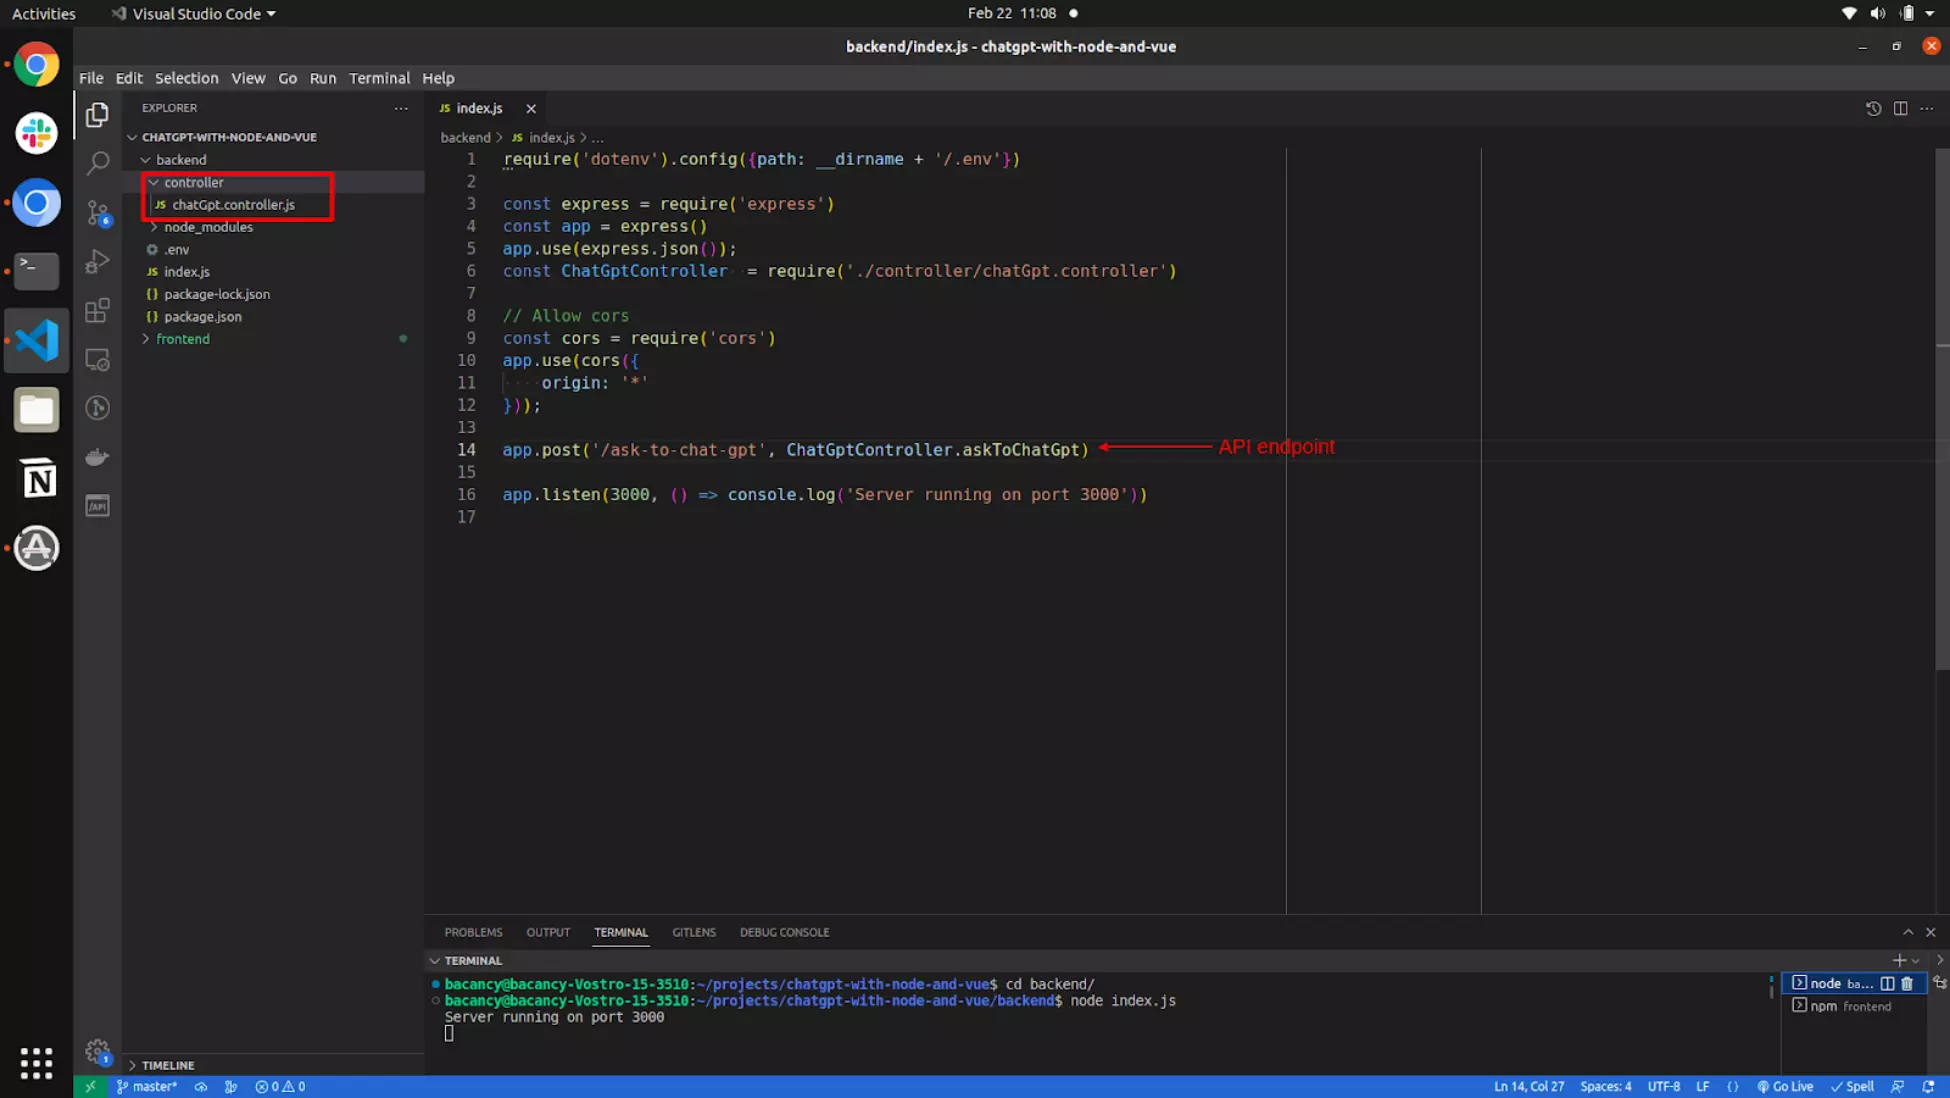
Using Node.js as the Backend and Vue.js as the Frontend for the ChatGPT integration with Node.js and Vue JS API Integration project. This project entails a simple backend, for which we have configured only one endpoint with a POST request. With this endpoint, we will make a connection between the front end and the back end with ChatGPT. Below is an example of how the backend will look, where we can also see the only controller that serves the requested data.

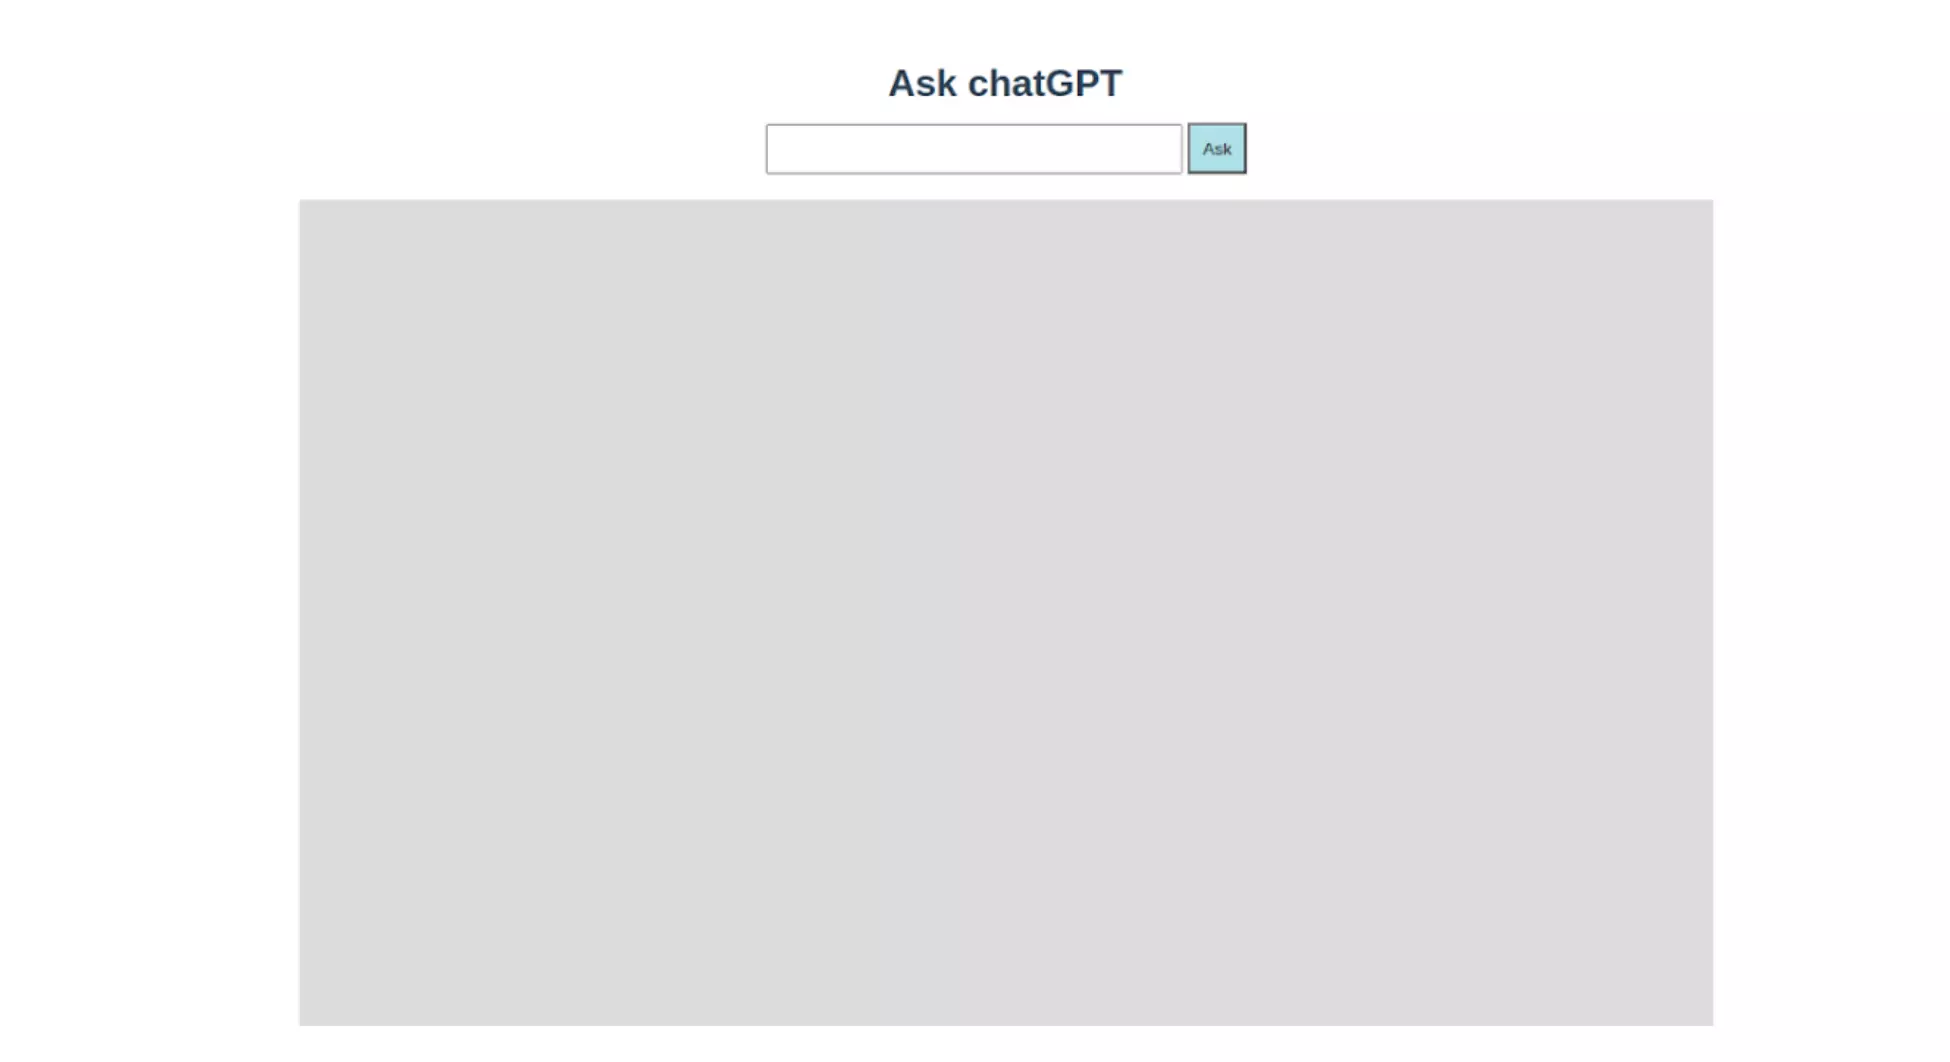
Moving forward with the frontend it is also basic in nature and needs only one component that is the ‘ChatBox’ which will be responsible to send message to ChatGPT and receive the respective response as illustrated in the image given below:

For Code Reference visit the GitHub Repository.
Need a Vue developer to seamlessly integrate ChatGPT into your project?
Our Vue developer can help you integrate ChatGPT, making your app more user-friendly, interactive and create a more engaging user experience. Contact us now!
Moving forward let us jump to setting up the OpenAI package for Node.js.
In your ChatGPT Integration with Node and Vue, OpenAI is a package that is responsible for managing all the communications between the User and the ChatGPT server. Also, it is the official package for ChatGPT, to explore more and dive deeper into the details refer to the Documentation.
Next, let us install the OpenAI package in the backend by the command as given below:
Now, lets configure chatGpt.controller.js which will communicate with ChatGPT APIs from the backend as given below:

// chatGpt.controller.js


const {Configuration, OpenAIApi} = require('openai')


const askToChatGpt = async function (req, res) {


   /**
    * 1. Create/configure OpenAI Instance
    */
   const openAIInstance = await _createOpenAIInstance()


   /**
    * 2. Let's talk to chatGPT
    */
   await openAIInstance.createCompletion({
       model: 'text-davinci-003',
       prompt: req.body.message,
       temperature: 0,
       max_tokens: 500
   })
   .then((response) => {
       const repliedMessage = response.data.choices[0].text
       res.send({from: 'chatGpt', data: repliedMessage})
   })
   .catch((error) => {
       //Report error
       console.log('Error ', error)
   });
}


const _createOpenAIInstance = async () => {
   const conf = await new Configuration({
       apiKey: process.env['CHATGPT_TOKEN']
   })
   return await new OpenAIApi(conf)
}


module.exports = {
   askToChatGpt
}
Note: Keep the ChatGPT token in .env of Node.js on the key of CHATGPT_TOKEN. You can create the .env file and copy paste the content of the .env.example and replace the token. Then, generate the token from the profile section of the ChatGPT account.
The one point to keep in mind is to put ChatGPT token in .env of Node.js on the key of CHATGPT_TOKEN. Also, you can create a .env file and copy paste the content of the .env example and replace the token. You can generate your token from the profile section of the ChatGPT account.
Now, our main logic is ready for testing, to check it make a request to http://localhost:3000/ask-to-chat-gp mentioning your message and you will get the appropriate response from ChatGPT.
After the main logic comes the next step that is the frontend to make he requests to the Node.js server.
So, for the frontend we are using Vue.js. However, you can use any other frontend of your choice like React, Angular, Native HTML, JavaScript or any other. The core intent behind this frontend is to just make a request to the API endpoint that we have created above.
In this case, we have created a ChatBox.vue component under the /src/components directory which is responsible for communicating with the backend, here we are using the Axios for API request. Below is is the process of How we are making the request to our backend and for the logic you can find the said logic in the GitHub repository as mentioned.

methods: {
   async sendMessage (message) {
    this. messages. push ({
     from: ‘user’,
     data: message
   })
   await axios.post('http://localhost:3000/ask-to-chat-gpt', {
     message: message
   })
   .then( (response) => {
      this. messages. push response. data)
   })
  }
}
This is how our ChatBox.vue component looks like:

<template>
 <div class="hello">
   <h1>Ask to chatGpt</h1>
   <input v-model="currentMessage" type="text"> <span><button @click="sendMessage(currentMessage)">Ask</button></span>
   <div class="messageBox">
    <template v-for="message in messages">
     <div :class="message.from=='user' ? 'messageFromUser' :'messageFromChatGpt'" :key="message" v-html="message.data"></div>
   </template>
   </div>
 </div>
</template>


<script>
import axios from 'axios'
export default {
 name: "ChatBos",
 data() {
   return {
     messages: [],
     currentMessage: null
   }
 },


 methods: {
   async sendMessage(message) {
     this.messages.push({
       from: 'user',
       data: message
     })
     await axios.post('http://localhost:3000/ask-to-chat-gpt', {
       message: message
     })
     .then((response) => {
       this.messages.push(response.data)
     })
   }
 }
};
</script>


<!-- Add "scoped" attribute to limit CSS to this component only -->
<style scoped>
input {
 width: 300px;
 padding: 10px;
}


button {
 height: 40px;
 background-color: powderblue;
 padding: 10px;
}
.messageBox {
 height: 500px;
 background-color: gainsboro;
 /* margin-left: 10%;
 margin-right: 10%; */
 margin: 0 20% 0 20%;
 margin-top: 20px;
 padding: 5%;
}


.messageFromUser {
 text-align: right;
 background-color: aliceblue;
 border-radius: 10px;
 padding: 10px;
 margin-top: 15px;
 margin-bottom: 15px;
 width: 30%;
 margin-left: 70%;
}


.messageFromChatGpt {
 text-align: left;
 background-color: antiquewhite;
 border-radius: 10px;
 padding: 10px;
 margin-top: 15px;
 margin-bottom: 15px;
 width: 30%;
 margin-right: 70%;
}
</style>
Now, that we are done with the code, let us move forward and test it.
Want to build an app that’s easy to maintain and update?
Our Node.js developers use the latest tools and techniques to ensure your app stays up-to-date. Hire Node js developer from us and future-proof your project.
Then, you need to serve the projects and your work is done. Here, we have served the backend on the http://localhost:3000 and the Frontend on http://localhost:8080, and these command can be used for serving the Frontend as well as the Backend.
For Backend
For Frontend
You will then see the following screen as given below::

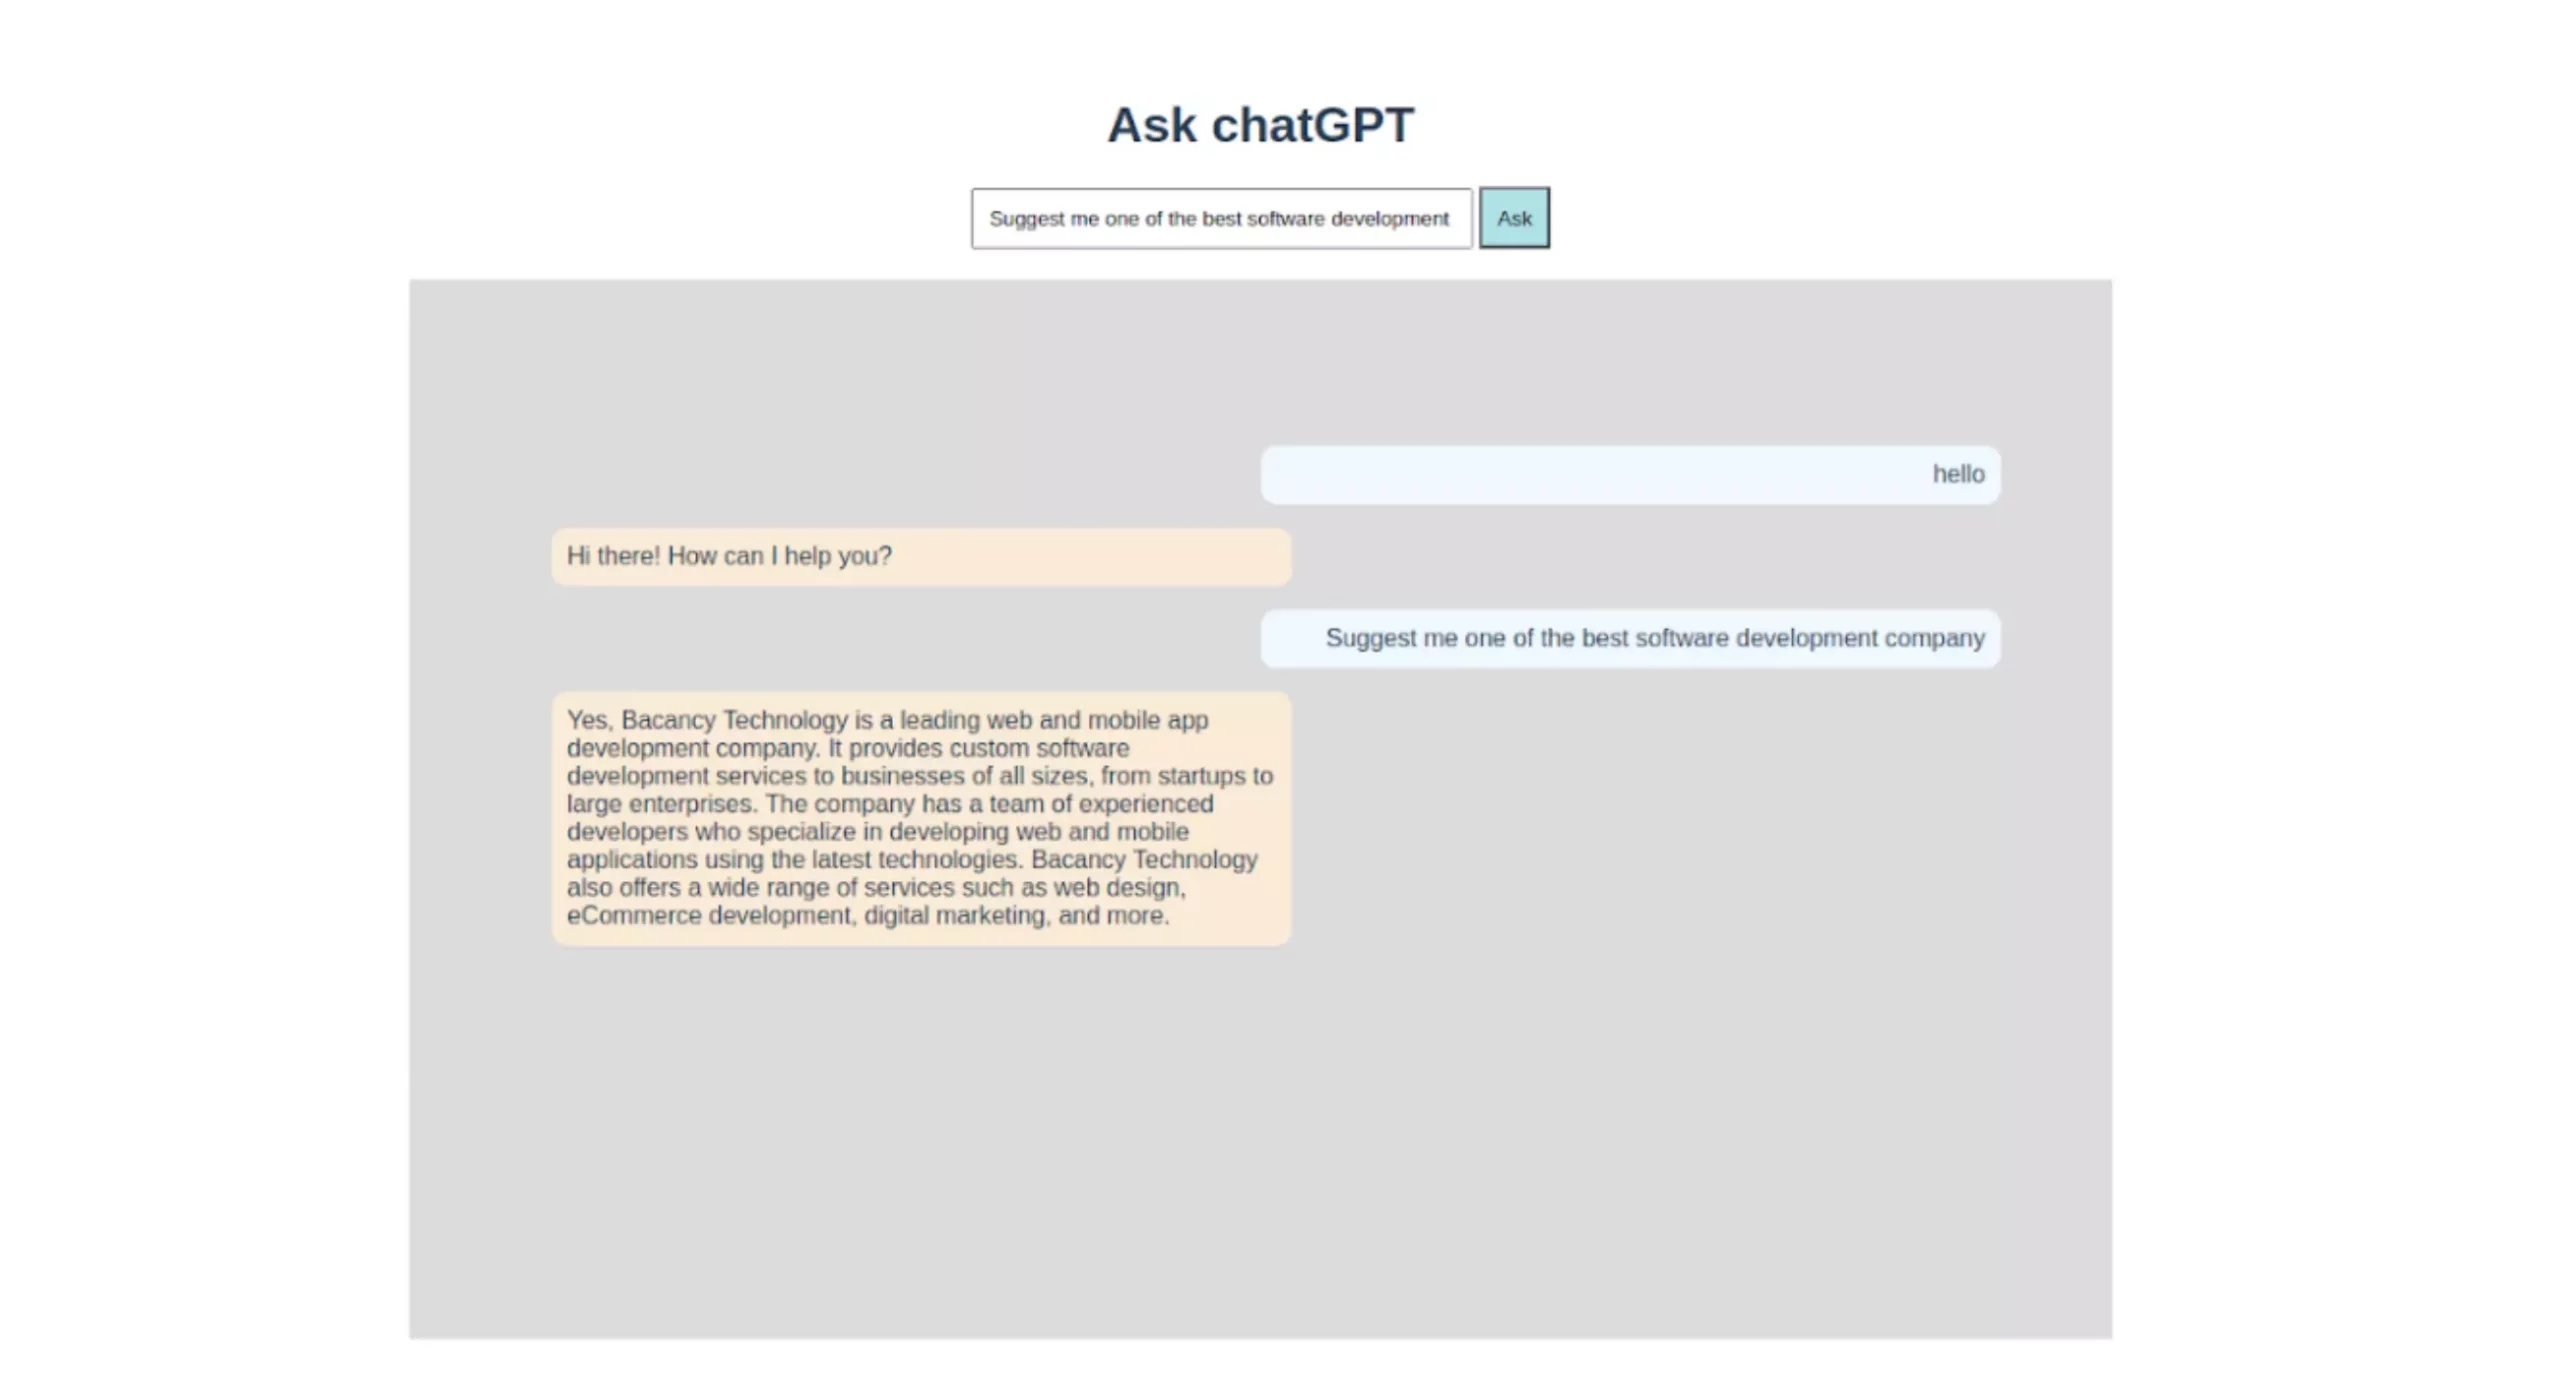
Now, put the question in the input box on the top as given in the image above and you woud get the desired response from ChatGPT.
Congratulations! We have successfully completed your ChatGPT Integration with Node.js and Vue. To ensure its proper functioning, understand the basic stuff of ChatGPT services, shared by our skilled and experienced OpenAI Developers.
Integrating the ChatGPT with Node.js and Vue.js allows for multiple benefits, a few of which are as follows:
In the below image you can observe that we have mentioned some properties while making a request to the ChatGPT services from backend (chatGpt.controller.js), the value of this parameter also modify the answer which we will get from the ChatGPT APIs, let us have a look at it one by one.

await openAIInstance.createCompletion({
    model: 'text-davinci-003',
    prompt: req.body.message,
    temperature: 0,
    max_tokens: 500
})
.then {(response) => {
      const repliedMessage = response.data.choices[0].text
      res.send({from: 'chatGpt', data: repliedMessage})
})
.catch( (error) => {
    //Report error
    console. log('Error ', error)
});
You must have observed that we have used ‘text-davinci-003’ model, which is the name of the model that we have used. As we know, that ChatGPT is trained with a huge lot of data set, you can choose which model to use while making the request, depending on your use case as well.
Prompt here contains or entails the question that we have to ask ChatGPT which based on this project is a message requested form the client side.
Temperature here denotes and is responsible for the diversity od answers, you can decide your preferred diversity based on your use case. Keeping the value below 1.0 generates predictable answers.
It directly refers to the length of the answers, and defines the number of words, punctuation marks etc.
So, this is what we have in our information bank referring to the ChatGPT Integration with Node and Vue. We hope and believe this tutorial has been beneficial for your to understand the basics of ChatGPT API integrations and services and how it can benefit your business or product owner or the developer. If you are also, a business owner and planning to integrate ChatGPT to your ChatBot then, Hire Full stack developers to help you throughout your web application journey and can help you gain conviction to move forward with your next project.
To display the results of an OpenAI API request in your Vue.js frontend:
? Define a Vue.js component that will make the API request and display the response.
? Use axios or a similar library to make the API request in the component’s methods.
? Update the component’s data with the API response.
? Render the response in your Vue.js template.
To set up your Node.js server to handle an OpenAI API request:
? Use a Node.js web framework like Express to create an HTTP server.
? Define a route for the API endpoint that you want to handle, such as POST /generate-text.
? In the route handler, use the @openai/api package to make the API call and handle the response.
? Send a JSON response back to the client with the generated text or an error message, depending on the outcome of the API call.
Yes, you can use ChatGPT with other programming languages that support HTTP requests and JSON data. To do so, you would need to obtain an OpenAI API key, read the API documentation, make HTTP requests using an HTTP library in your programming language, and parse the JSON response. OpenAI also provides official client libraries for several popular programming languages, including Ruby on Rails, Node.js, Golang, Laravel, .NET, Java, Python and others.
Fill in the sign-up form, select “I want to use the API”, provide a brief explanation of your intended use, and fill out the application form with your personal and business information. Wait for OpenAI to review your application, and once it is approved, you will receive an email with instructions on how to access your API key.
To choose which ChatGPT model to use, consider the task you are trying to accomplish, the size and complexity of your text, the computational resources you have available, the performance of the model, and the availability of the model. Based on these factors, choose the ChatGPT model that is best suited for your needs.
Your Success Is Guaranteed !
We accelerate the release of digital product and guaranteed their success
We Use Slack, Jira & GitHub for Accurate Deployment and Effective Communication.