Table of Contents
Introduction
Angular application is divided into Components; those components help divide the business logic into separate files for better understanding. While working with this component-based architecture, it sometimes happens that one component is dependent on another component for further processing so that it passes data from one component to another.
There are various ways by which we can pass data from one component to another. Angular 7.2.0 introduced a new way to pass data using State Object while navigating between routed components. The benefit of using a state object is that you can share data between routed components with routeParams without displaying it on the URL segment, unlike queryParams in Angular.
Tutorial Goal: Passing Data Through Angular RouterState
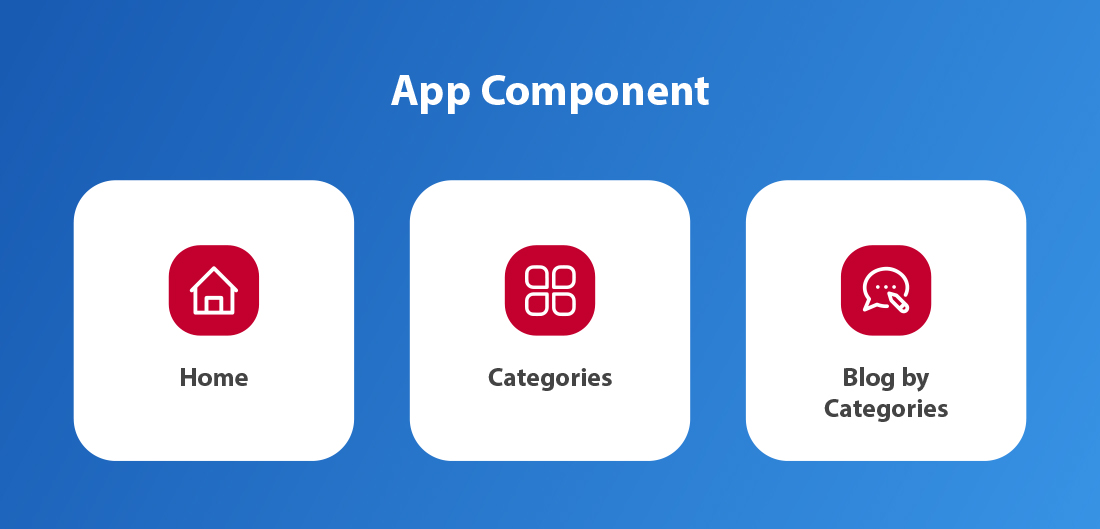
Before developing the demo application, let’s see what the demo app is about. We will build a blog application having three web pages – Home, Categories, and Blog by Categories. As per our blog title – Passing data through Angular RouterState, we will see how to pass data from the Categories component to the Blog by Categories component.
Check the below video for the user interface of the demo app. In the video, check the console for the data which has been passed using routerState.
Create Angular Application
To create a new angular application, type the below command:-
Note– You can name it whatever you want instead of my-blog-app. We are going to create a sample blog application here.
Answer the series of questions to create your project successfully. Make sure that you choose YES for – Would you like to add Angular routing? This will create a file app-routing.module.ts where we will be adding our project routes.
Configure Angular Project
Angular Project Structure

Angular Generate Components
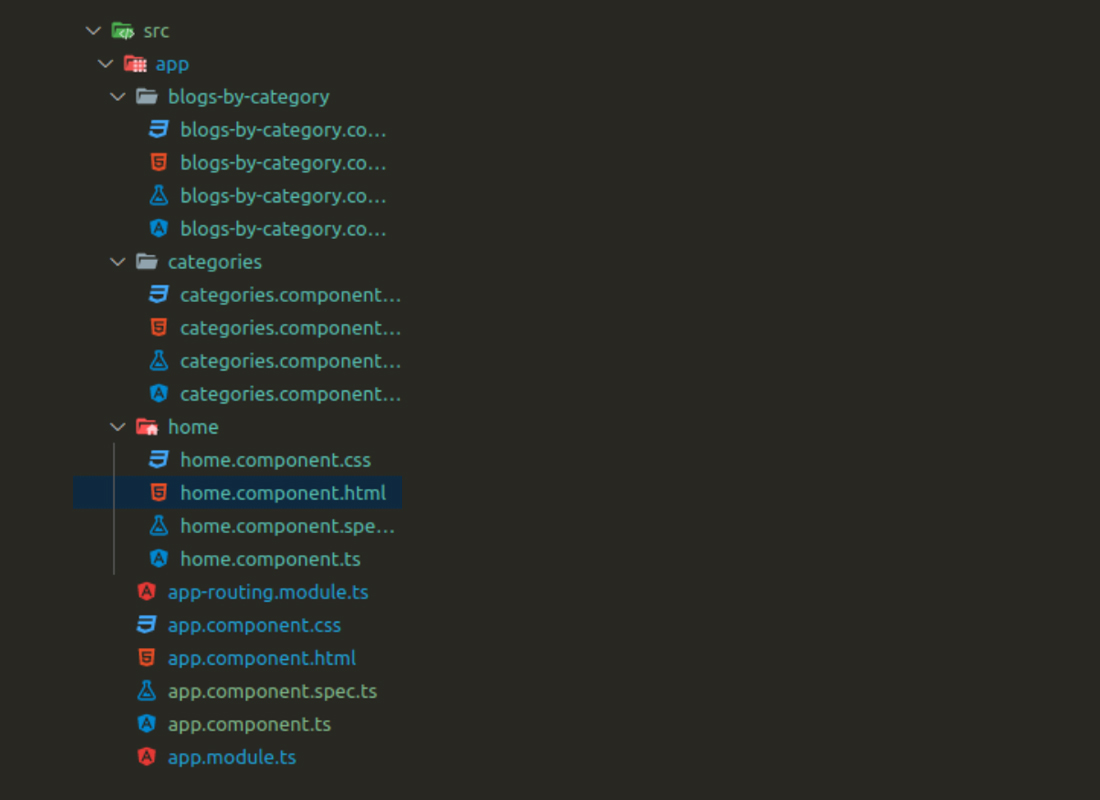
Generate components for Home, Categories, and BlogsByCategory for the blog app using the below commands.
After running the command, the project structure will be something like

Now we’ll create a mock service named MainServiceto fetch data for our blog app by using the below command
Now create two files: blog-list.json and categories.json for mock data and fetch this data from our main service.
// categories.json

[
 {
   "id":1,
   "name":"App Development"
 },
 {
   "id":2,
   "name":"Blockchain Development"
 },
 {
   "id":3,
   "name":"Cryptocurrency"
 },
]
// blog-list.json

[
 {
   "title": "How to contribute to Open Source?",
   "description":"Lorem, ipsum dolor sit amet consectetur adipisicing elit. Sunt ducimus aliquam nulla nobis quo mollitia rem nisi dolore alias natus dignissimos dolores eum aliquid officiis error dolorem, minima repellat cumque!",
   "keywords":"open-source, software, contribution",
   "meta_desc":"lorem, ipsum dolor sit amet consectetur adipisicing elit. Sunt ducimus aliquam nulla nobis quo mollitia rem nisi dolore alias natus dignissimos dolores eum aliquid officiis error dolorem, minima repellat cumque!",
   "category":"Open Source"
 },
 {
   "title":"Angular Vs React Vs Vue.js",
   "description":"Lorem, ipsum dolor sit amet consectetur adipisicing elit. Sunt ducimus aliquam nulla nobis quo mollitia rem nisi dolore alias natus dignissimos dolores eum aliquid officiis error dolorem, minima repellat cumque!",
   "keywords":"angular, angular.js , react, react.js , vue, vue.js",
   "meta_desc":"lorem, ipsum dolor sit amet consectetur adipisicing elit. Sunt ducimus aliquam nulla nobis quo mollitia rem nisi dolore alias natus dignissimos dolores eum aliquid officiis error dolorem, minima repellat cumque!",
   "category":"Web Development"
 },
 {
   "title":"Objective C or Swift, What to choose for iOS development",
   "description":"Lorem, ipsum dolor sit amet consectetur adipisicing elit. Sunt ducimus aliquam nulla nobis quo mollitia rem nisi dolore alias natus dignissimos dolores eum aliquid officiis error dolorem, minima repellat cumque!",
   "keywords":"iPhone, iOS, software, mobile development",
   "meta_desc":"lorem, ipsum dolor sit amet consectetur adipisicing elit. Sunt ducimus aliquam nulla nobis quo mollitia rem nisi dolore alias natus dignissimos dolores eum aliquid officiis error dolorem, minima repellat cumque!",
   "category":"App Development"
 },
]
Now paste the below code into the service

import { HttpClient } from '@angular/common/http';
import { Injectable } from '@angular/core';
import { Observable } from 'rxjs';

@Injectable({
 providedIn: 'root'
})

export class MainService {

 constructor(private http: HttpClient) { }

 getAllCategories() {
   return this.http.get('assets/categories.json');
 }

 getBlogByCategory(): Observable {
   return this.http.get('assets/blog-list.json');
 }
}
We’ll be updating the code of these below files:
- app-routing.module.ts
- home.component.ts
- categories.component.ts
- categories.component.html
- blogs-by-category.component.ts
- blogs-by-category.component.html
Configure Routes
In this file, we will declare routes with their respective components. So, the application would know which component has to be rendered on which route.
// app-routing.module.ts

import { NgModule } from '@angular/core';
import { RouterModule, Routes } from '@angular/router';
import { BlogsByCategoryComponent } from './blogs-by-category/blogs-by-category.component';
import { CategoriesComponent } from './categories/categories.component';

const routes: Routes = [
 {
   // Empty path that will redirect to categories page.
   path: '',
   redirectTo: 'home',
   pathMatch: 'full'
 },
 {
   // Display home component of the blog
   path: 'home',
   component: HomeComponent
 },
 {
   // Displays list of blog categories
   path: 'categories',
   component: CategoriesComponent
 },
 {
   // Displays list of blogs with the selected category
   path: 'blogs-by-category',
   component: BlogsByCategoryComponent
 }
];

@NgModule({
 imports: [RouterModule.forRoot(routes)],
 exports: [RouterModule]
})
export class AppRoutingModule { }
Basic User Interface
In this section, we will add the below code for our basic user interface.
// app.component.html
Replace your html file code with the below code.

<header class="header">
 <h2 class="logo"><a routerLink="/">My Blog</a></h2>
 <ul class="main-nav">
   <li><a routerLink="/">Home</a></li>
   <li><a routerLink="categories">Categories</a></li>
   <li><a href="#">Services</a></li>
   <li><a href="#">About Us</a></li>
 </ul>
</header>

<router-outlet></router-outlet>
// home.component.html

<div class="welcome-text">
 <h3>Welcome to my blog please choose a <em><a routerLink="/categories">category</a></em> for blog content to display.</h3>
</div>
Now let’s move to our core part of the tutorial: Passing Data Through Angular RouterState and start transferring data between the components.
Passing Data
After updating the superficial user interface, open files related to the Categories component to update the UI and write logic to pass data to the Blog by Categories component.
// categories.component.html

<ul>
  <li *ngFor="let category of categories">
    <a routerLink="/blogs-by-category"    [state]="category">{{category.name}}</a>
  </li>
</ul>
Here, with the help of an attribute directive [state]=”object”, we will pass data to another component. This attribute is used in case you’re relying on declarative navigation in your app.
// categories.component.ts

import { Component, OnInit } from '@angular/core';
import { MainService } from '../services/main.service';

interface Categories {
 name: String;
}

@Component({
 selector: 'app-categories',
 templateUrl: './categories.component.html',
 styleUrls: ['./categories.component.css']
})

export class CategoriesComponent implements OnInit {
 public categories: Categories[] = [];
 constructor(private mainService: MainService) { }


 ngOnInit(): void {
   // Calling the below method to load the service when component loads.
   this.getAllCategories();
 }

 getAllCategories() {
   // We’re subscribing to service to get a list of categories available.
   this.mainService.getAllCategories().subscribe((listCategories: any) => this.categories.push(...listCategories));
 }
}
Receiving Data
Now it’s time to update the user interface for the Blog by Categories component and write the logic for receiving data from the Categories component. Replace your .html and .ts file with the below code.
// blog-by-categories.component.html
Replace your html file code with the below code:-

<!-- Here we are looping through each blog object to display on html -->
<div *ngFor="let blog of blogs">
 <h3>{{blog.title}}</h3>
 <p>{{blog.description}}</p>
</div>
// blog-by-categories.component.ts

import { Component, OnInit } from '@angular/core';
import { MainService } from '../services/main.service';

interface Blog {
 title: String;
 description: String;
 keywords: String;
 meta_desc: String;
 category: String;
}

@Component({
 selector: 'app-blogs-by-category',
 templateUrl: './blogs-by-category.component.html',
 styleUrls: ['./blogs-by-category.component.css']
})
export class BlogsByCategoryComponent implements OnInit {
 public blogs: Blog[] = [];
 constructor(private mainService: MainService) { }

 ngOnInit(): void {
   const selectedCategory = history.state.name // Here we got our selected category object and we access the name of the category using object key.
   this.getBlogsByCategory(selectedCategory);
 }

 getBlogsByCategory(category: string) {
   this.mainService.getBlogByCategory()
     .subscribe((blogs: Blog[]) => {
       this.blogs.push(...blogs.filter(blog => blog.category === category)); // Filter based on selected category.
     });
 }

}
Github Repository
You can directly choose to clone the github repository and play around with the code. Run the below command to clone the repo or visit the source code.
Conclusion
I hope the tutorial for passing data through Angular RouterState was useful for you. For more such tutorials, visit the Angular tutorials page and feel free to clone the github repository. If you are looking for dedicated developers to manage your Angular project or build it from scratch, contact us to hire Angular developer. We assure you that our skilled developers will use their problem-solving skills and meet all your project requirements.
Your Success Is Guaranteed !
We accelerate the release of digital product and guaranteed their success
We Use Slack, Jira & GitHub for Accurate Deployment and Effective Communication.


