Many of you might have used Sign-In with Google or Facebook in several websites to escape prolonged Sign Up procedure. Right?
Yes, I have too logged in this way. As I dive into a developer career, I was always fascinated to know how social logins actually work on any website. So, after exploring, I am here to share my knowledge.
So, in this article, we will gradually learn how any user can register into our application using Google or Facebook Sign-In in Angular.
Note:- I am not going to use any NPM package for this.
Let’s get started!
GMAIL
To integrate Gmail Sign in, we need to have an OAuth Client ID from the developer’s console. So, first of all, let’s create it.
Step (1) Go to Google developer console. And login with your developer’s credentials.
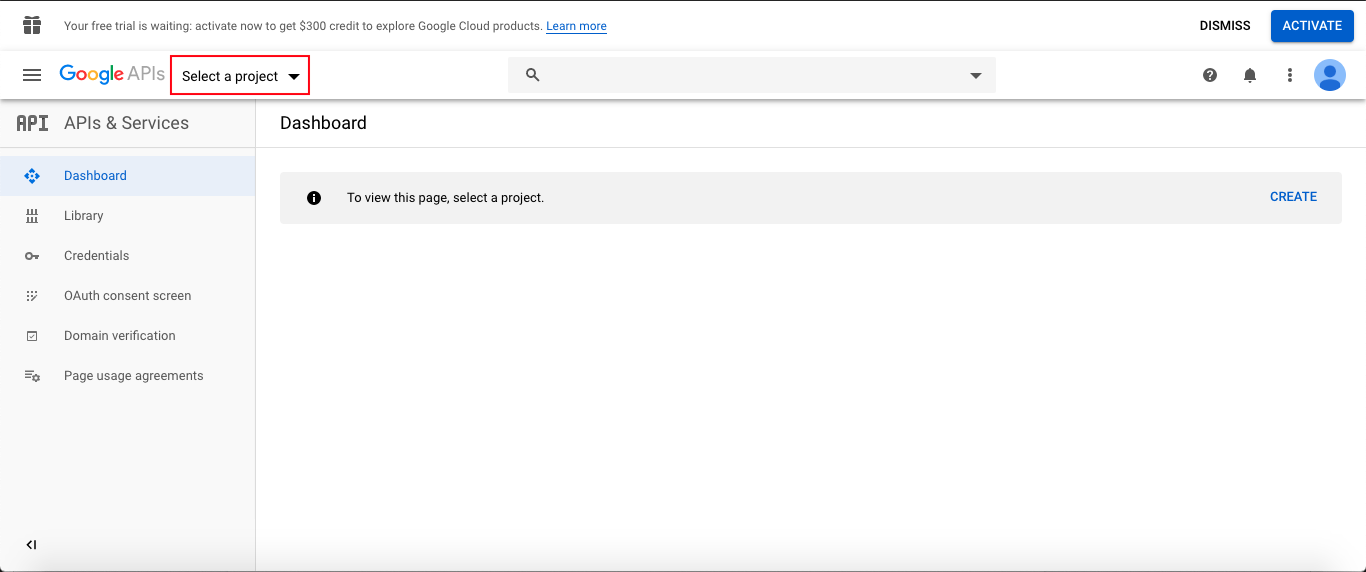
Step (2) Click on select a project.
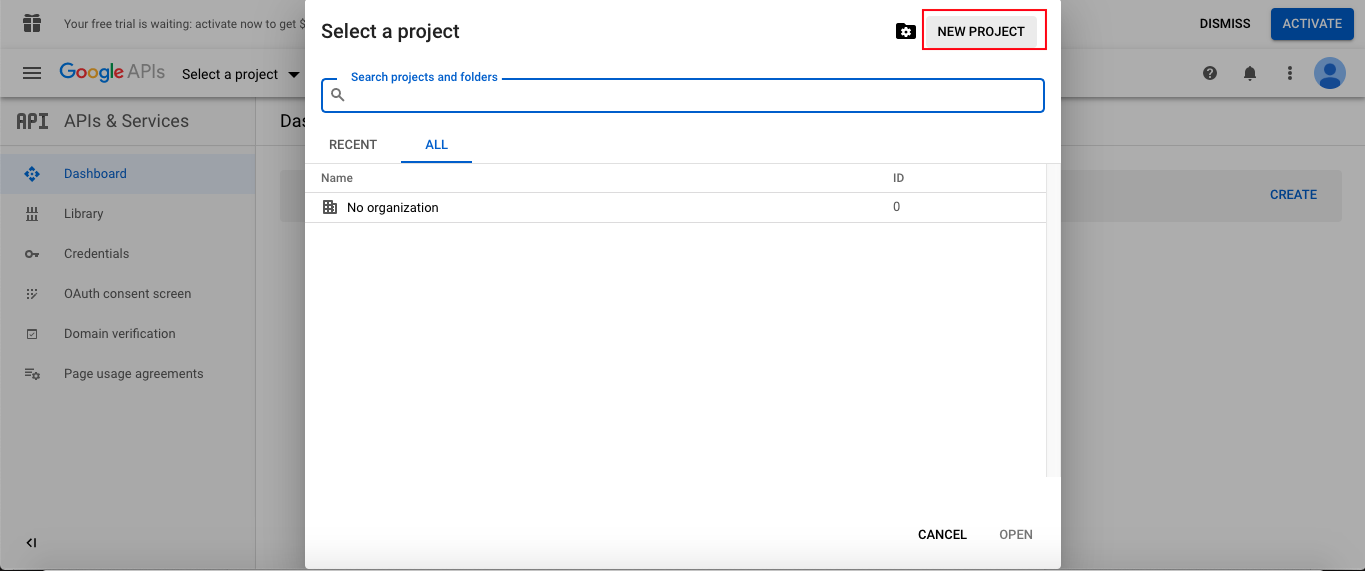
Step (3) A modal popup will be open. Click on NEW PROJECT. If you already have a project, you can go directly to Step5.
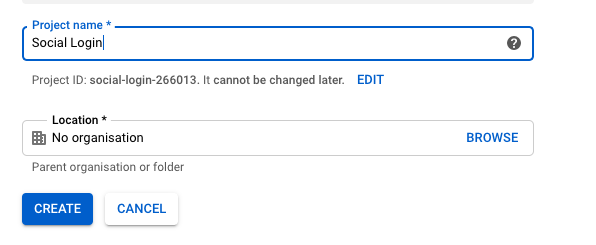
Step (4) Write your Google project name and click on the CREATE
button.
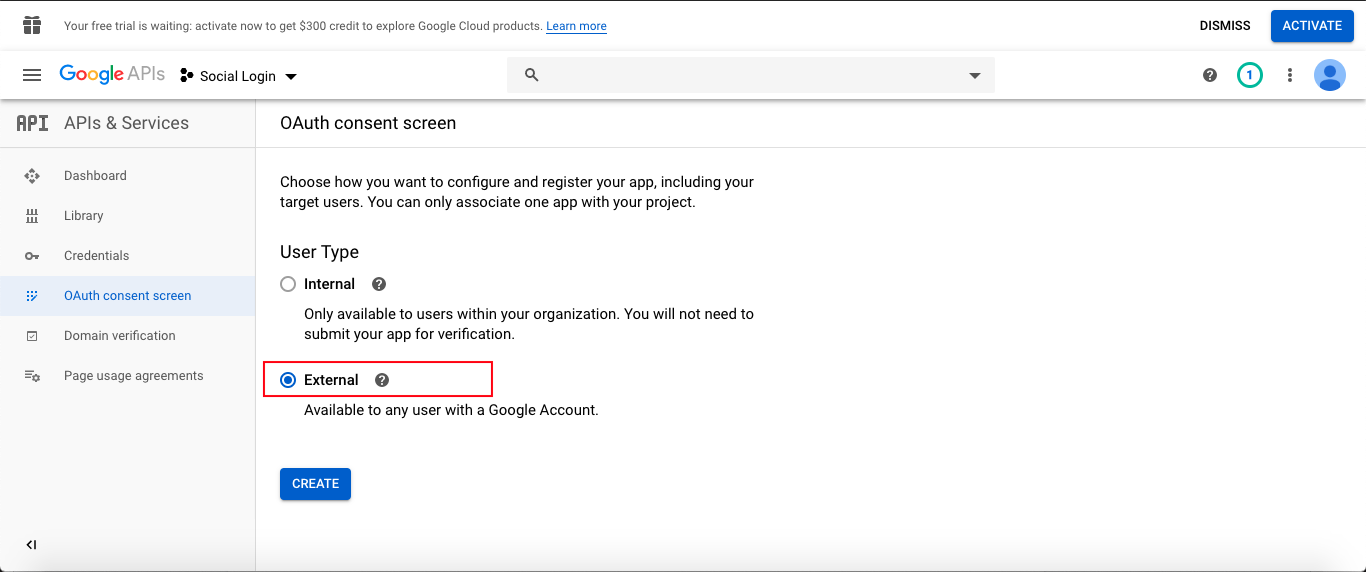
Step (5) Go to the OAuth consent screen from the left sidebar and then select External. So your OAuth consent screen will be available to all users who are holding google accounts. Click on CREATE.
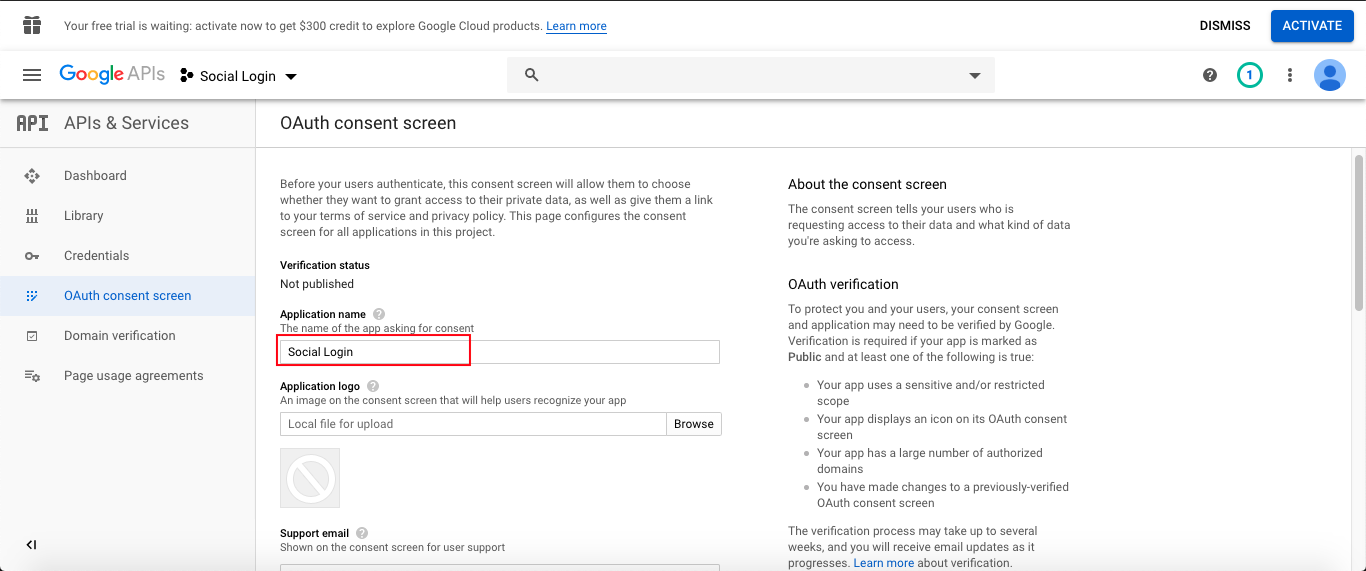
Step (6) Write the name of your application. This name will be shown on your OAuth consent screen. There are also other optional fields like Authorised domain link, Application Homepage link, Privacy policy link, and Terms of Service link. And these must be hosted on an Authorised domain.
If provided, these links will be shown on your OAuth consent screen.
After providing these details, click on the Save button below.
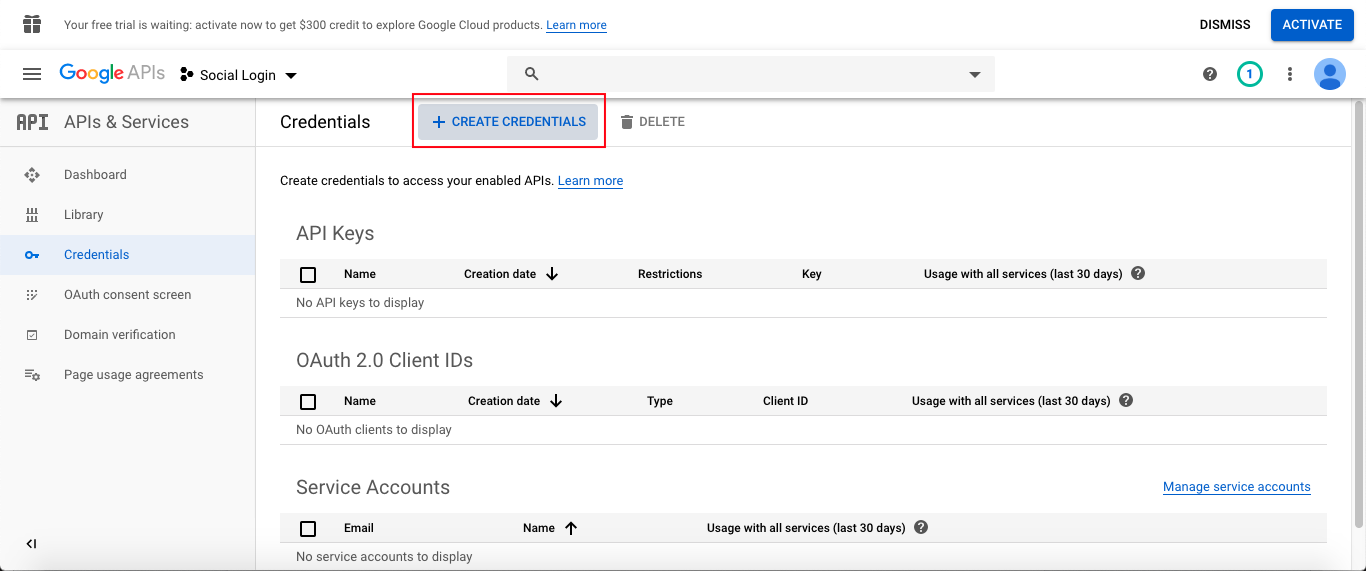
Step (7) Now go to Credentials from the left sidebar and click on + CREATE CREDENTIALS.
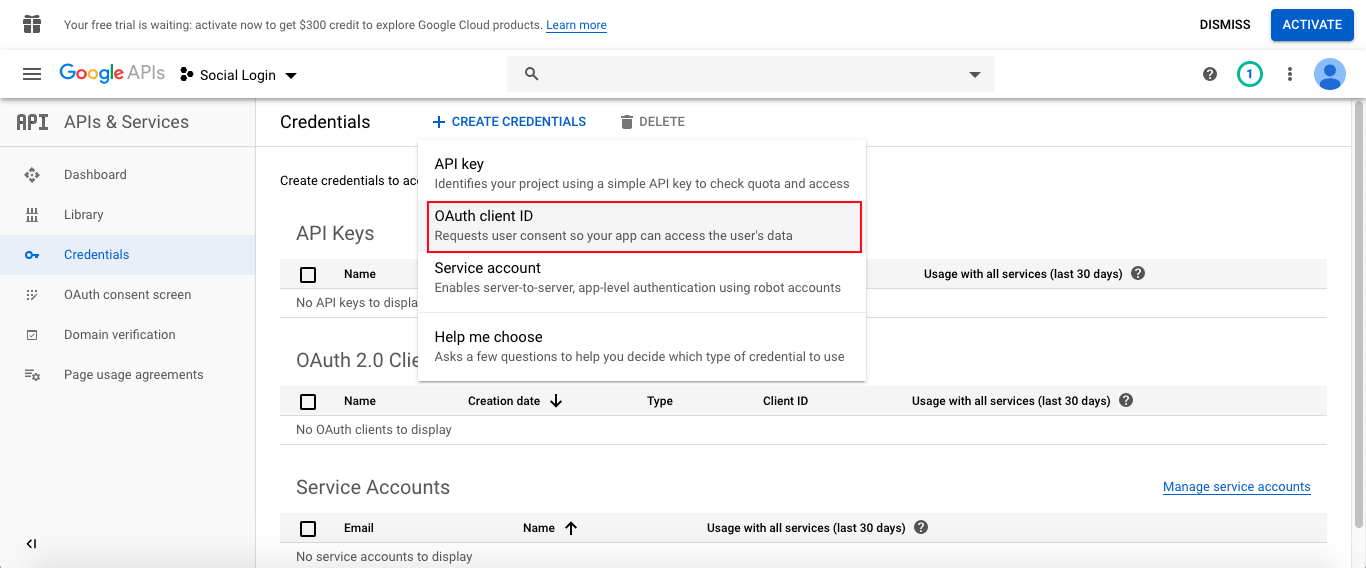
Now click on OAuth Client ID
Then select a Web application and fill the below details.
This name will be the name of your credentials. Also, you must enter the Authorised javascript origins. I am running my application on localhost:4200.
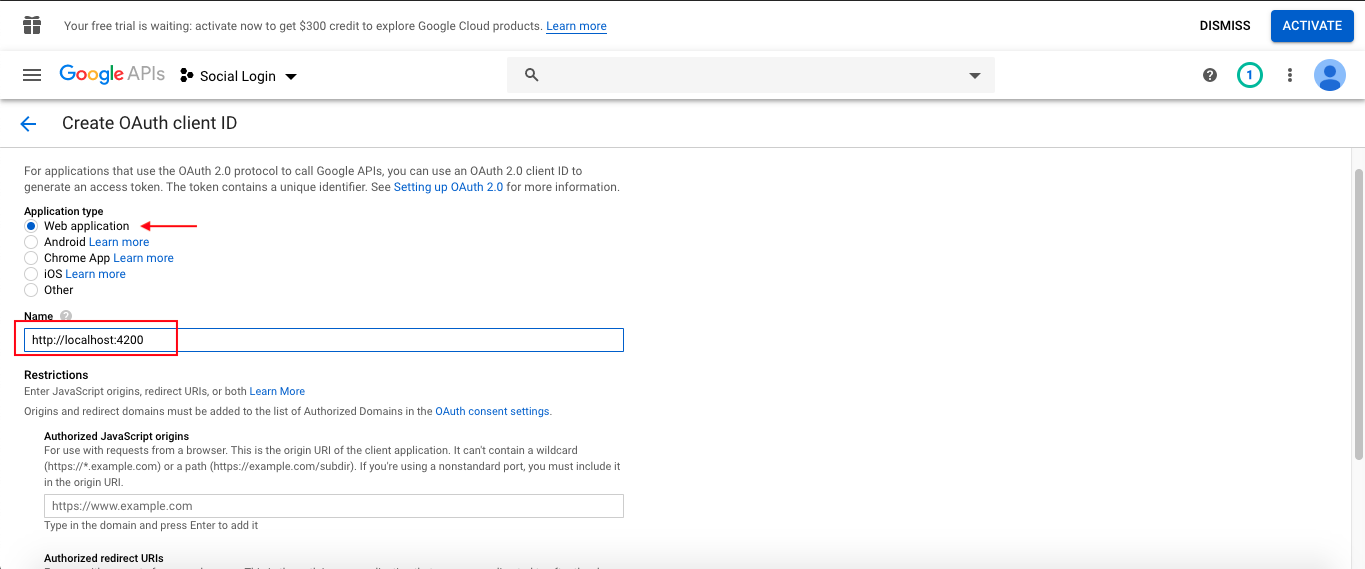
Authorized redirect URIs are optional.
After filling all the details, click on CREATE.
A modal popup will get open; there you will get your Client ID and Client Secret.
Now you have successfully created your OAuth Client ID.
NOTE: If I change my authorized javascript origin to localhost:4100,
As this origin is not listed in Authorised Javascript Origins, an error will be thrown in an application at runtime.
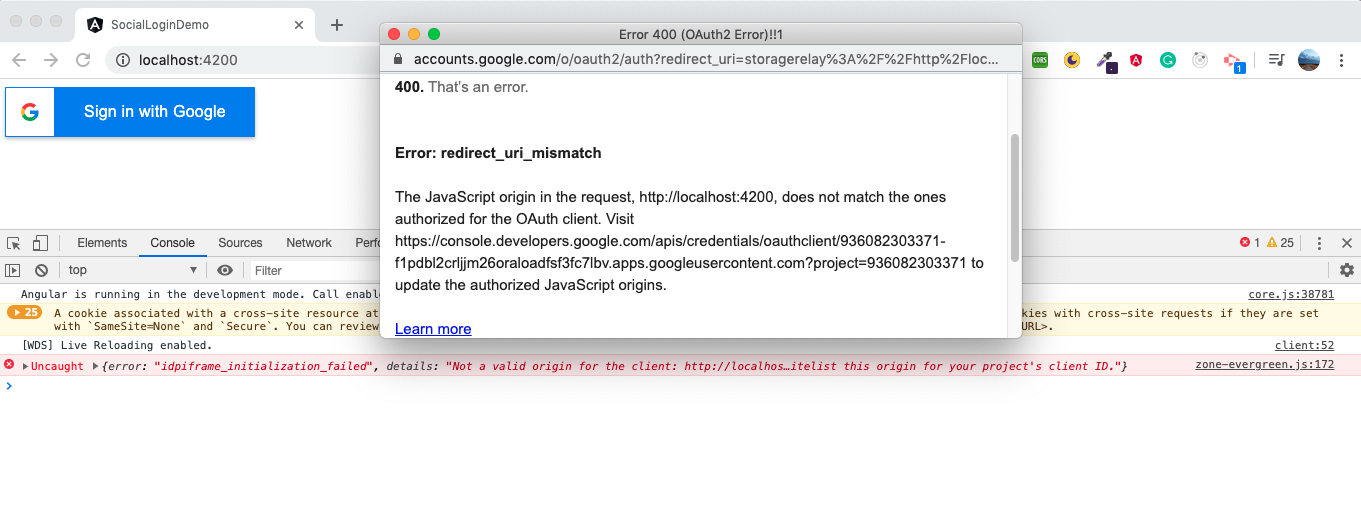
Now let’s add code in our Angular 8 application.
Open your index.html file and add below lines in < head > tag.
< meta name="google-signin-client_id" content="your-client-id" >
Now, add the below code in your component.
component.html:
< div id="googleBtn" >< /div > < br / >
component.ts:
Firstly, Declare a global variable after all the import statements.
declare var gapi: any;
Now declare and define the below function
public btnRender(): void {
   const options = {
     scope: 'profile email',
     width: 250,
     height: 50,
     longtitle: true,
     theme: 'dark',
     onsuccess: (googleUser => {
       let profile = googleUser.getBasicProfile();
       console.log('Token || ' + googleUser.getAuthResponse().id_token);
       console.log('ID: ' + profile.getId());
       console.log('Name: ' + profile.getName());
       console.log('Image URL: ' + profile.getImageUrl());
       console.log('Email: ' + profile.getEmail());

	// your-code-goes-here

     }),
     onfailure: ((error) => {
       console.log('failure', error);
     })
   };
   gapi.signin2.render('googleBtn', options);
 }
Now, Call the above function in ngOninit() lifecycle,
 ngOnInit() {
   this.btnRender();
 }
Now run the application…
You should see a Gmail Login button.
After successful login, you will get user id token. This id token should be sent to your server with an HTTPS request. There you must verify this token.
All information is given in this here.
That’s it! This is all you need to do.
NOTE: I have described only one of the methods to integrate Gmail sign-in button. But there are many other different ways to do it. You can check it in the official documentation.
For integrating Facebook login button in any application, we must have an APP ID, for that we need to create an application in Facebook developer’s console.
So, to set up your Facebook application, follow these steps.
Step (1) Go to Facebook developor’s console. And login with your developer’s credentials.
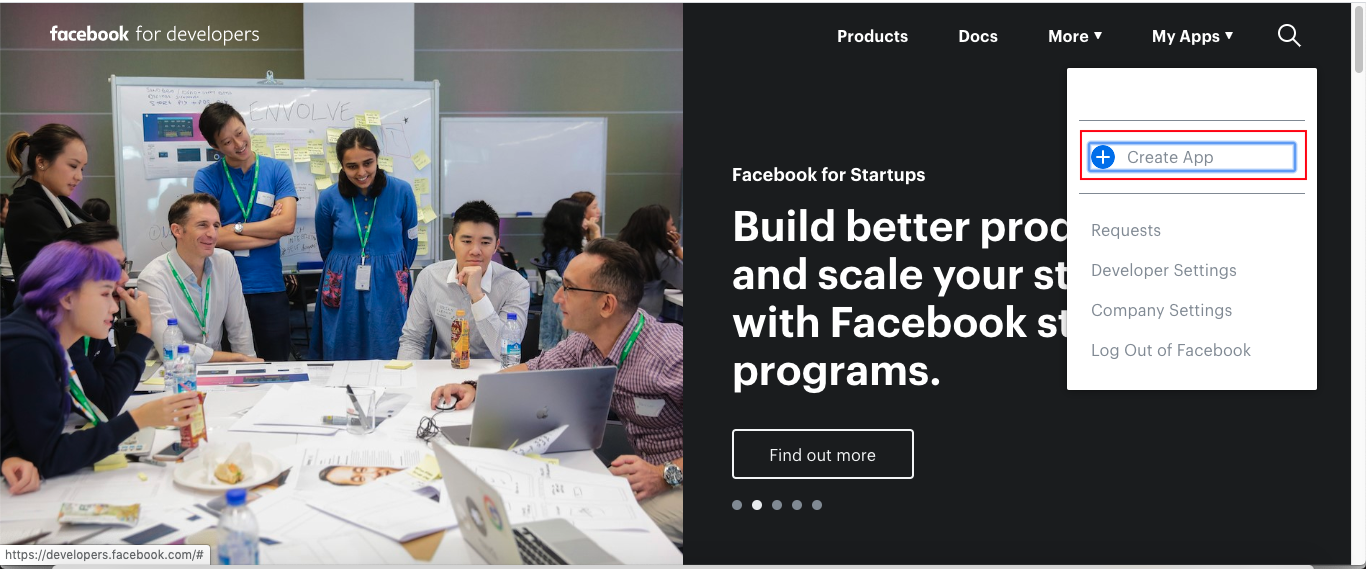
Step (2) After successful login, go to My Apps and click on Create App.
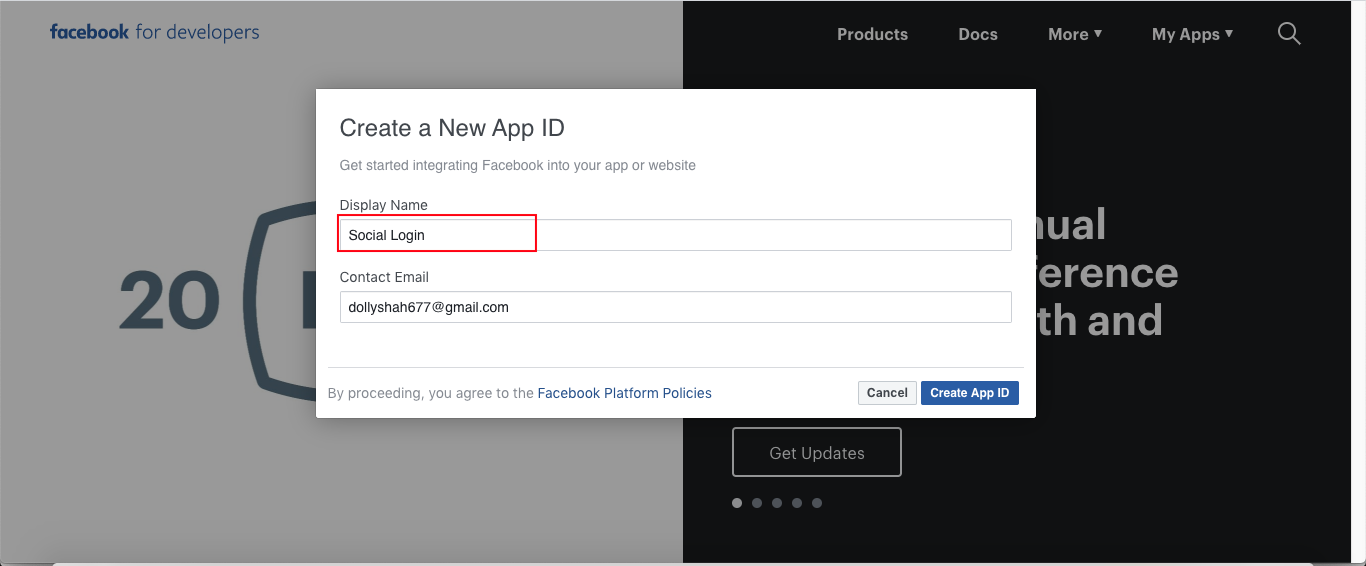
Step (3) A modal popup of Create a New App ID will be shown. Write the name of your application and then click on Create App ID.
You will see ReCaptcha dialog, check on it, and then click on submit.
Step (4) You can see your APP ID below the navigation bar. But it is a must to whitelist your site URL. So Set Up the Facebook Login option.
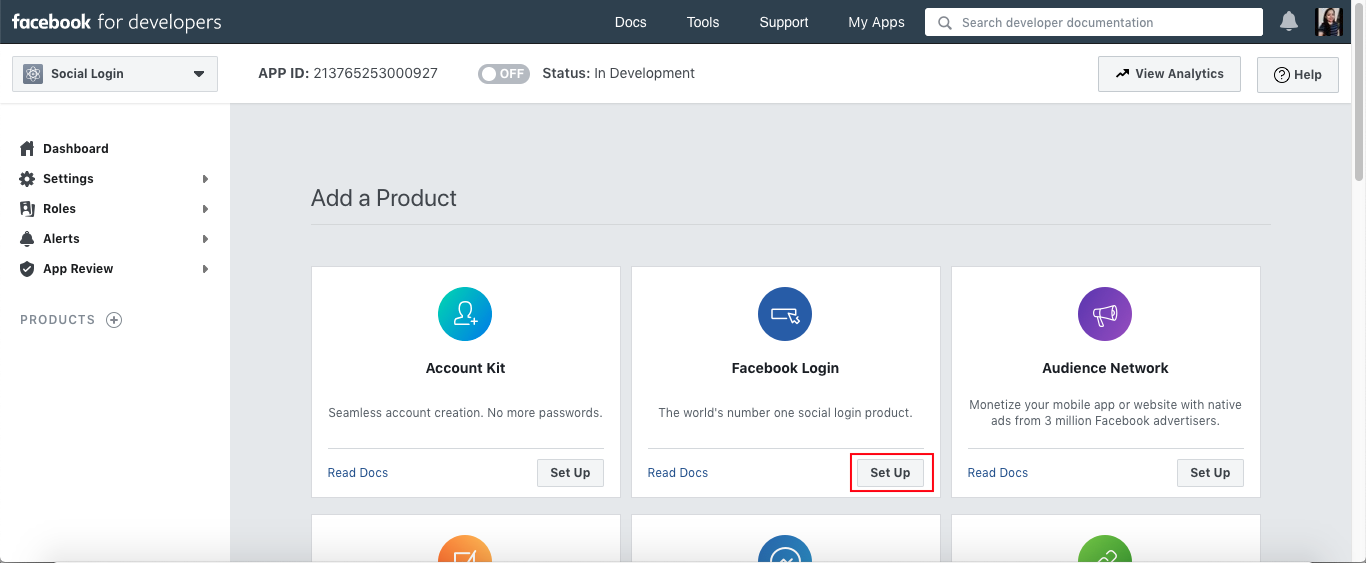
Step (5) Select the Web option.
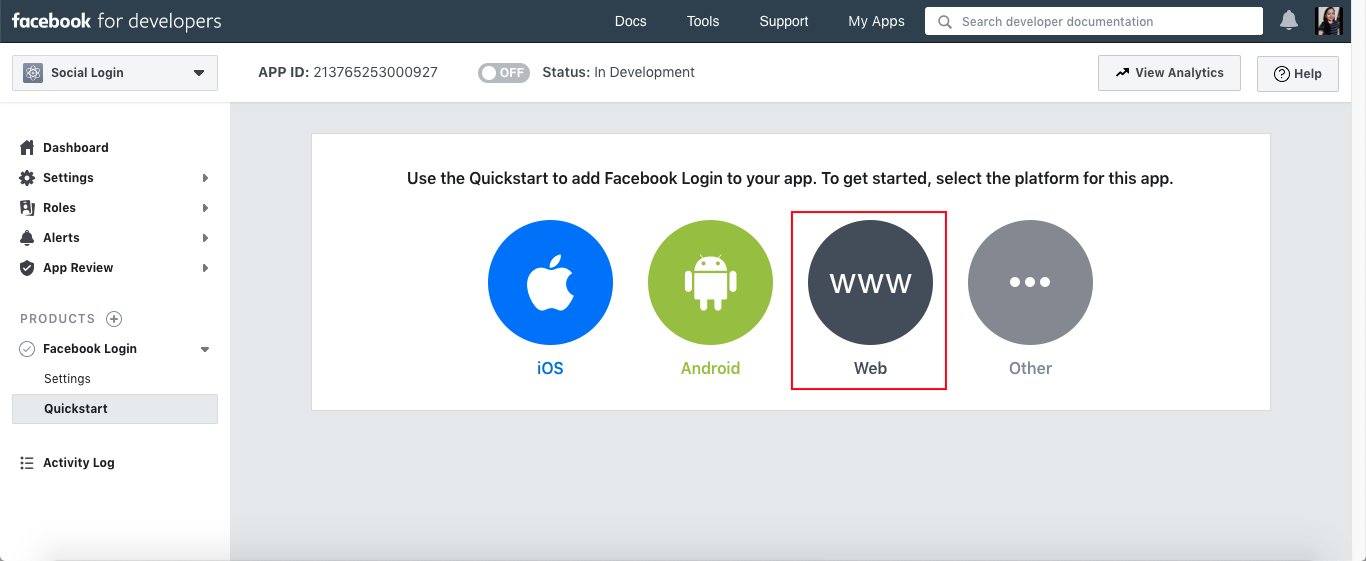
Step (6) Write your application running URL and save it. I am running my application on http:\\localhost:4200.
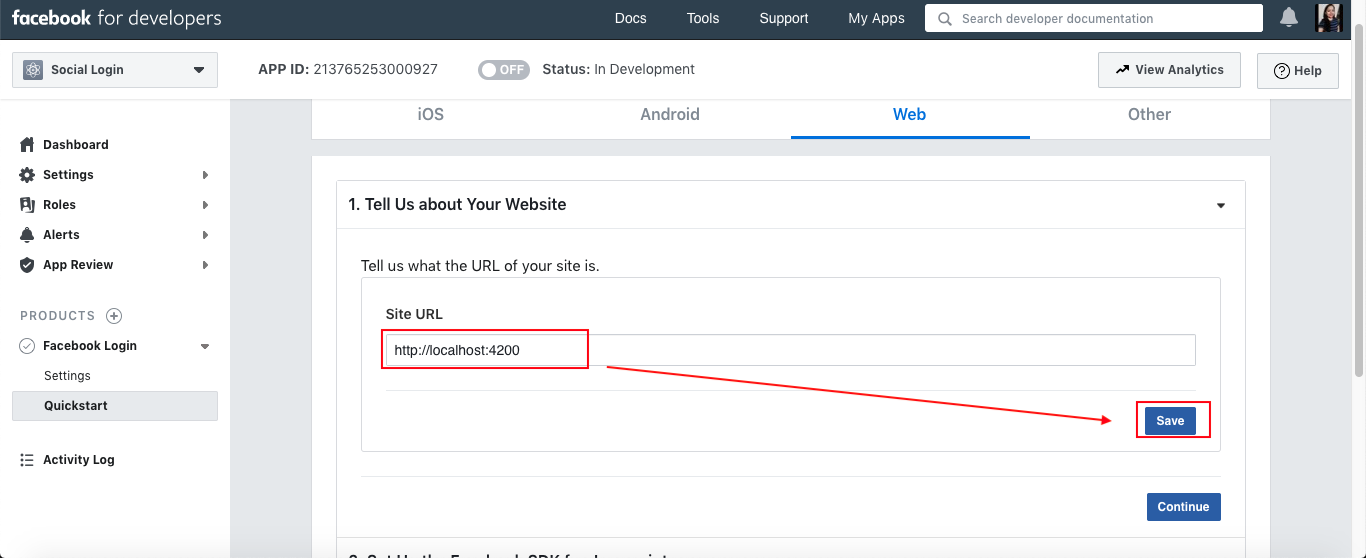
Save it.
That’s it. Your Facebook application is set up.
On clicking continue, you can see the steps to integrate Facebook login in your application. You can go through it. But don’t worry. I am not going to show you in just a moment.
Now let’s add code in our Angular 8 application.
Open index.html
Now open your component,
component.html
< div class="fb-login-button" data-width="250px" data-size="medium" data-button-type="login_with" data-use-continue-as="true" data-auto-logout-link="false" >< /div >
component.ts
Declare a global variable after all import statements,
declare var FB: any;
In your class constructor,
FB.fbAsyncInit = () => {
     FB.init({
       appId: ‘your-app-id’,
       cookie: true,
       xfbml: true,
       version: 'v5.0'
     });
     FB.AppEvents.logPageView();
   };
In ngOninit lifecycle,
  ngOnInit() {
   ((d, s, id) => {
     var js, fjs = d.getElementsByTagName(s)[0];
     if (d.getElementById(id)) { return; }
     js = d.createElement(s); js.id = id;
     js.src = "https://connect.facebook.net/en_US/sdk.js";
     fjs.parentNode.insertBefore(js, fjs);
   })(document, 'script', 'facebook-jssdk');

   this.statusChange();
 }
Add the below function,
 private statusChange(): void {
   FB.Event.subscribe('auth.statusChange', (response) => {
     console.log("submit login to facebook", response);
     if (response.status === 'connected') {
       if (response.authResponse) {
         FB.api('/me', {
           fields: 'last_name, first_name, email , picture , middle_name, name, name_format, short_name',
         }, (userInfo) => {
           console.log('userInfo', userInfo);
  		// your-code-goes-here
         });
       }
     }
     else {
       console.log('User login failed');
     }
   });
 }
Make sure that the application id you have mentioned in index.html and in the component should be the same.
That’s it. Now run the application.
You should see the Facebook login button.
This is the official documentation for Facebook login.
Few Points :
i) For getting more information about users aside from the above scopes, you need to grant your application. You can check this here.
ii) Facebook fetches only test user and developer account’s data in test mode. To fetch each user’s data, you need to make your application live. You can find test users in Roles Tab.
For more, please check out my GITHUB repository.
This is it. I hope you have enjoyed reading this blog post, and soon. In case if you are looking for Angular minds, to make user authentication even more secure, then hire angular developer from us to leverage our top-of-the-line expertise. For any suggestions and queries, feel free to comment to below
Happy Coding


